For that to be a reality, you need to fully grip all the ins and outs of what makes exceptional photography.
While you may just be a beginner or casual photographer, scaling to pro-level photography is guaranteed if you take the time to learn what the experts do to remain phenomenal in their craft. You must start thinking, talking, and acting like them. You must dig into their language, style, and mindset.
Fortunately, this guide will simplify all that for you. As you read on, you will discover terminology commonly used in the world of photography to aid your learning curve.
A popular terminology you will hardly ever miss in any photography chatter is aperture. It forms an integral part of the backbone of true photography. While for a beginner it may sound like pure jargon, by the end of the guide you will have demystified all that. Learning all you need to know about the term will help you hone your photography skills at an unprecedented speed.
Let’s dig in and find out how much aperture dictates your photography experience.
Contents
- What is aperture?
- How is aperture measured?
- How does aperture affect your photos?
- How does aperture affect depth of field?
- How does aperture affect exposure?
- How does aperture affect shutter speed?
- How do you adjust your camera’s aperture?
- How do you choose the right aperture?
- Understanding maximum and minimum lens apertures
- What are the different apertures and their uses?
- Common aperture FAQs
- At what aperture does my lens allow in the most light?
- At what aperture does my lens allow in the least light?
- What is the best aperture for a blurry background?
- Higher vs lower aperture, which is better?
- What are Starburst and Sunstar effects?
- What is lens diffraction in photography?
- What are the effects of a small aperture?
- Why does aperture matter in photography?
- Final words on aperture
What is aperture?
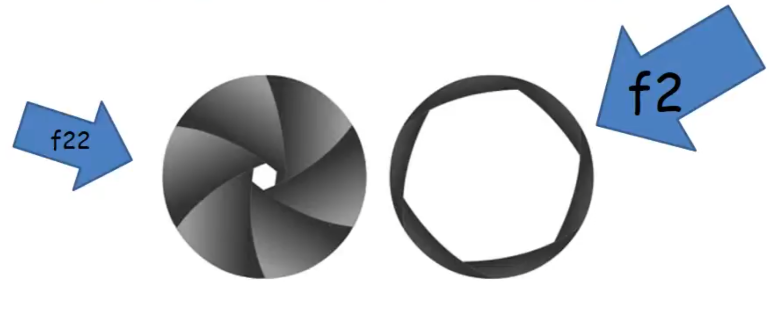
The higher the F-Stop the less amount of light.
Image Credit: © Rachel Leintz/CC BY 3.0
There are three major pillars of photography namely, aperture, ISO, and shutter speed. Collectively, they have termed the exposure triangle because they play a significant role in the overall quality of your photos. That said, aperture happens to be the most important of the pillars, and understanding how it works is bound to make your photography all the more exciting because of the additional creative control it affords you.
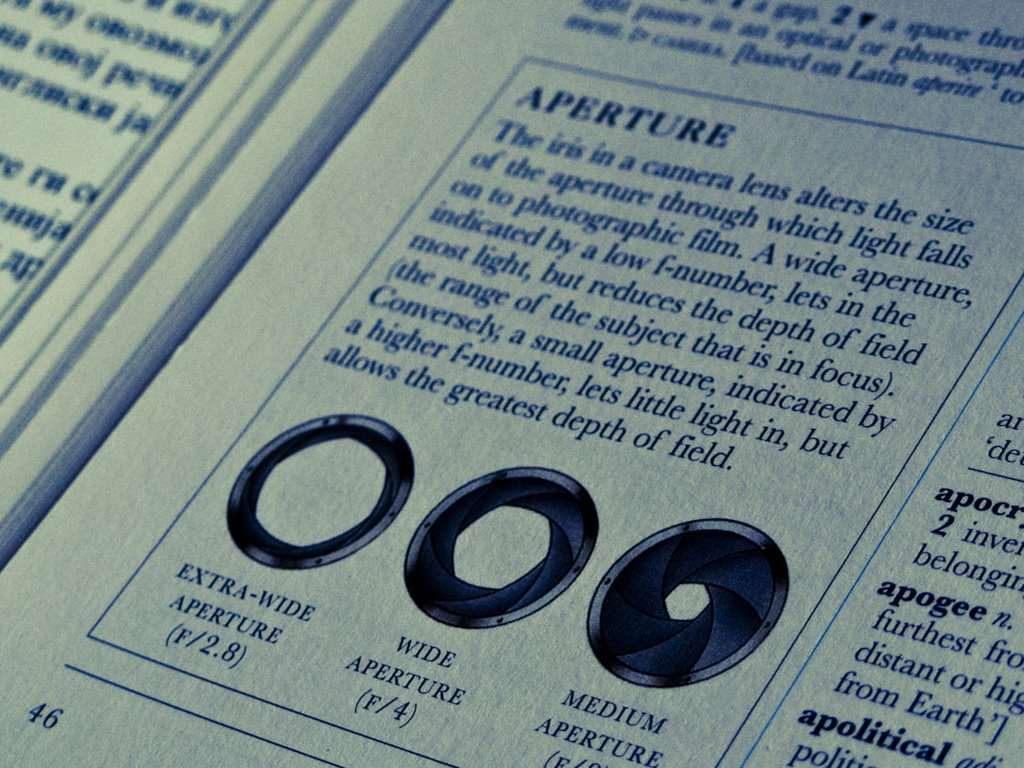
Now to aperture. Being a foundational photography element, aperture has a lot to do with the lighting of your shots. Simply put, aperture means the opening in your camera lens or the opening in the diaphragm of your camera lens that allows light into the camera.
Think of it as another powerful camera setting. As you adjust the setting, you are essentially adjusting the size of the aperture causing varying effects to the brightness of your photos. A large aperture opening lets in more light into the camera sensor resulting in brighter photos. On the flip side, a small aperture opening lets in less light into the sensor resulting in darker photos.
To notice aperture in your camera, it is calibrated in f/stops and it can display on your camera’s LCD screen or viewfinder. Keep reading as we explore aperture measurement using f/stops.
How is aperture measured?
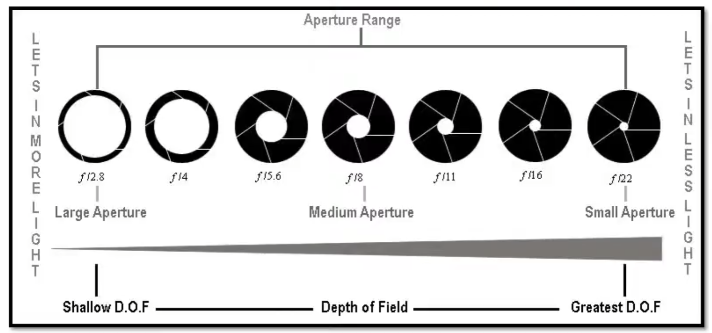
The measurement of aperture in your camera takes the form of f/stops or f-numbers. These numbers are usually calibrated as f/1.4, f/2, f/2.8, f/4, f/5.6, f/8, and so on. The rule of thumb when measuring aperture is, the bigger the f-number the smaller the aperture, and vice versa. That means f/1.4 represents a larger aperture than f/8. It lets in more light into the camera. While this may sound counterintuitive at first, with regular practice you will get the hang of it sooner than you expect.
In other words, adjusting the f-number changes the size of your aperture hence dictating the amount of light passing through to your lens. By shifting from one f/stop to another, you are actually halving or doubling the aperture size in either direction.
For example, shifting your aperture from f/2.8 to f/4 essentially halves the aperture size such that the quantity of light getting into the lens is equally halved. Ultimately, this also halves the brightness of your photos. When you go in the reverse direction, you are doubling the aperture size.
Common phrases used with aperture measurement are ‘stopping down’ to mean increasing the f-number one step in order to halve the aperture size as well as ‘stopping up’ to mean decreasing the f-number one step in order to double the aperture size.
If this concept gets confusing at first, practice using the Aperture Priority mode in your DSLR. This shooting mode allows you to set your aperture manually while the camera automatically sets your shutter speed based on the amount of light available.
The more you experiment with this simple mode, the more comfortable you become adjusting your aperture size and noting the varying effects different apertures have on your photos. With time, you can gradually switch to a full manual mode like a pro.
How does aperture affect your photos?
Impage Credit: © katie_mccolgan/CC BY 2.0
Having learned what aperture is: an opening in your lens that widens and narrows based on your camera setting or f/stop value, it is also imperative to understand how aperture ultimately affects your photos. At the end of the day, it is the end result you are after-a quality photo.
The effects of aperture on your photos can be looked at in terms of exposure, depth of field, and shutter speed.
How does aperture affect depth of field?
Aperture plays an integral role in the depth of field of your shots. Depth of field (DOF) simply means the amount of your image that is in focus or how blurry or sharp your subject’s background is. In other words, to what extent is your photograph sharp from front to back?
An image may have a shallow or thin depth of field or a deep or large depth of field. In the first instance, the subject’s background is entirely out of focus whereas in the second instance both the foreground and background are in focus hence sharp.
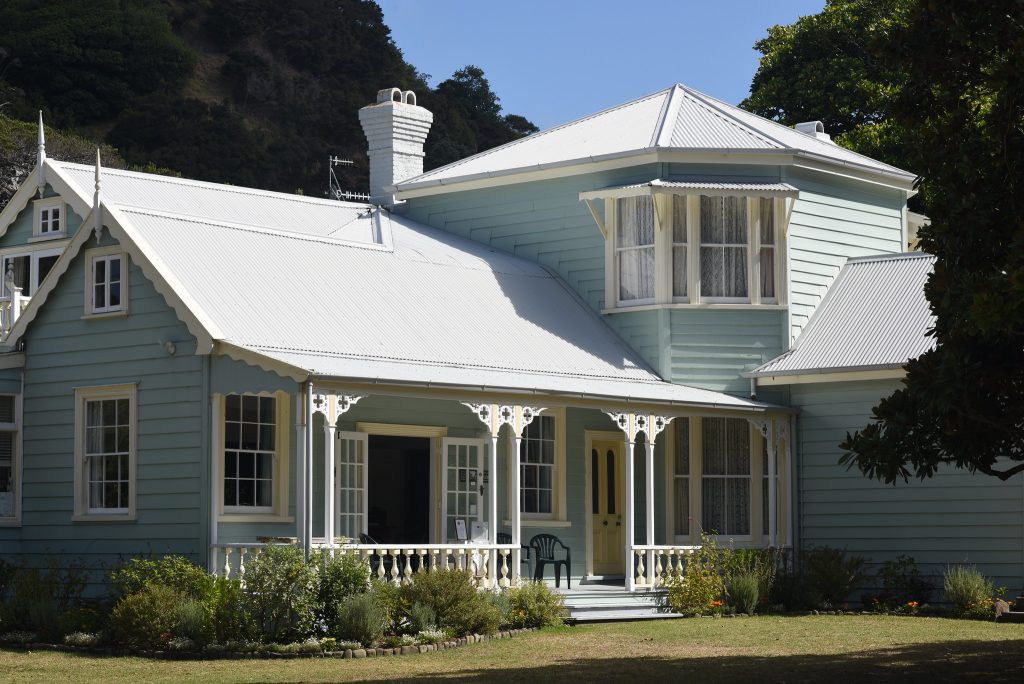
Image Credit: © Chris HunkelerFollow/CC BY-SA 2.0
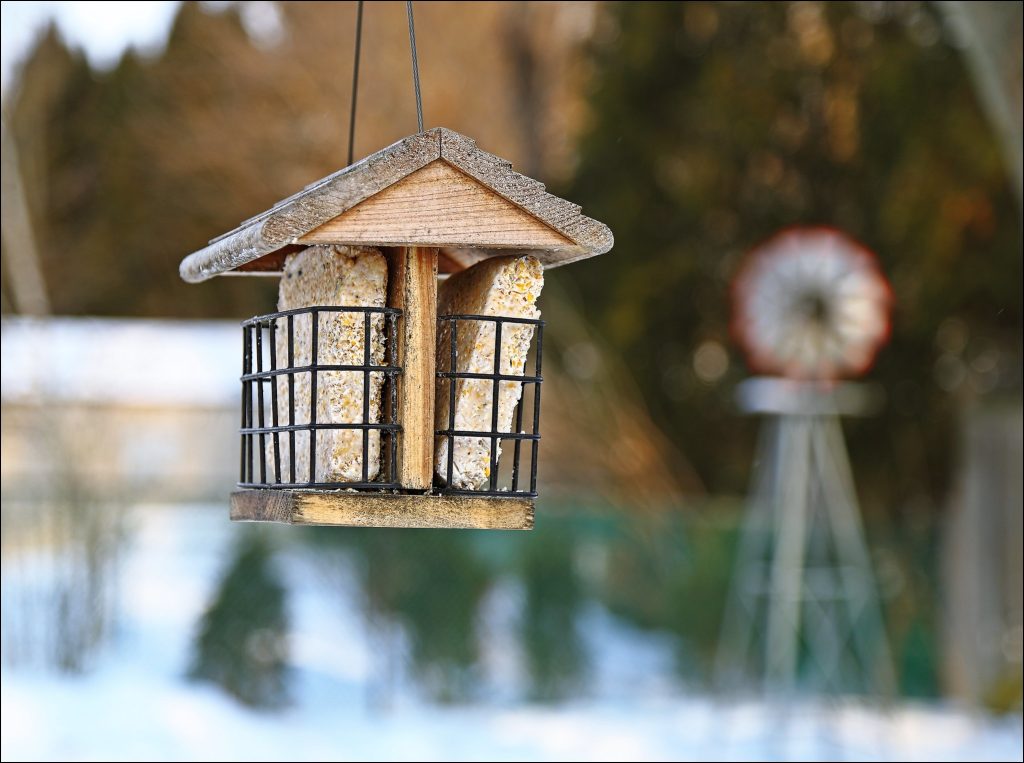
Image Credit: Sue Thompson/CC BY-ND 2.0
So, when a fellow photographer tells you your photo has a large depth of field, they simply mean most of your photo is in focus or sharp. Essentially, the sharpness of that photo spreads from the foreground to the background.
If they however state your photo has a thin or small depth of field, they mean only a small section of the image is in focus or sharp. This is one of the most incredible artistic styles used by most avid photographers. The effect produces sharp subjects with a blurry background. The blurry background effectively helps to accentuate the subject. It is a popular stylistic effect in especially portrait photography.
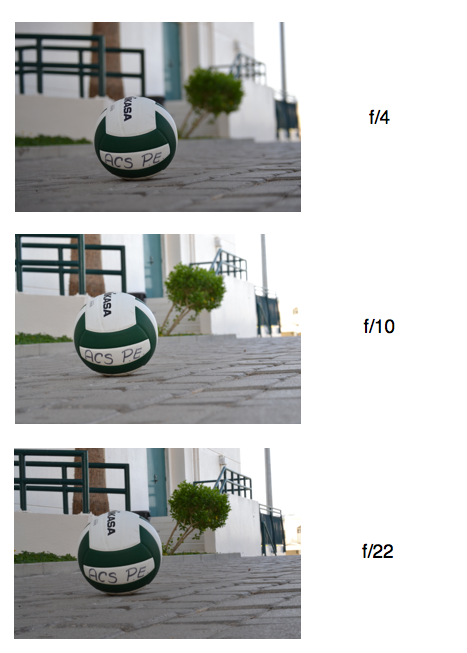
So, how does aperture play out here? With a wide aperture or small f-number, expect to get photos with a shallow depth of field. That means an aperture of f/2 has very little of the image in focus compared to an aperture of f/16.
Therefore, using a large aperture effectively produces a shallow focus effect. The viewer of your photo will thus be drawn to the subject and not the busy background. Opting for a smaller aperture for the shot makes it almost impossible to separate your subject from its background as effectively as you would want to.
When capturing your shots with a large aperture, you can as well blur the foreground objects of your subject without losing the subject’s sharpness. Practice using this creative trick when trying to isolate your subject.
Shooting with a smaller aperture produces a smaller amount of background blur. That means such apertures are ideal for especially architecture and landscape photography where both the foreground and background details are important.
So, to remain on top of your creativity, practice shooting in varying apertures to study the different effects that has on the sharpness or details of your photo. As you do this, remember also the knowledge of aperture and exposure will come into play a lot. You might want to master that too!
How does aperture affect exposure?
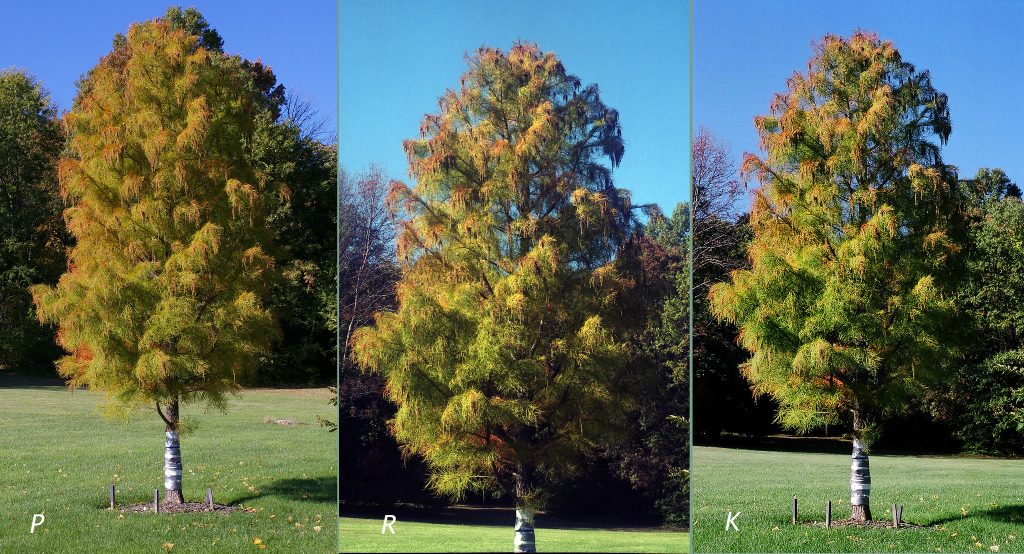
Image Credit: © Nesster/CC BY-SA 2.0
In photography, exposure simply means the brightness of your photos. Exposure can be short or long which can create some cool and creative images. With that in mind, your aim in photography is to end up with the best photo. The best photo is a function of avoiding either extreme: extremely bright photos or extremely dark photos.
So, what has this got to do with aperture? Recall earlier we highlighted aperture as one of the most fundamental pillars of exposure alongside its cousins, ISO and shutter speed.
As you widen or increase your aperture size, you allow more light into the sensor. This has the effect of brightening your image. The reverse is also true. By narrowing or decreasing your aperture size, you allow less light into the camera sensor. This ends up darkening your image.
That said, here is a pro tip. When out shooting a stunning sunset and you keep getting extremely bright photos in return, that is an alert to narrow your aperture in order to darken the image further. The tip for cool sunset shots is, always go with a narrower aperture and you will never go wrong.
What about photographing a dark forest? In this scenario, you might end up with dark and rather shadowy photos being a low-light environment. To remedy this effect and fit right into the scene, start by widening the aperture to brighten up the photos a little.
Using ISO and shutter speed appropriately, you can also vary your exposure with a lot of ease. Simply increase the ISO or decrease the shutter speed to get a bright image. Conversely, decreasing the ISO or increasing the shutter speed produces a darkened image.
It all boils down to how you play around with the different settings to remain on top of light management or control. If you can become a master of light, you will definitely transform into a master photographer regardless of the shoot scene or environment.
The different variables of the exposure triangle work perfectly in conjunction with each other. You cannot, therefore, work with aperture in isolation when trying to achieve the perfect exposure. That’s because the effect of each variable can cancel the other one out.
For example, increasing your aperture produces the same effect as increasing your ISO or reducing your shutter speed. That means boosting the ISO while lowering the aperture produces similar exposure.
How does aperture affect shutter speed?
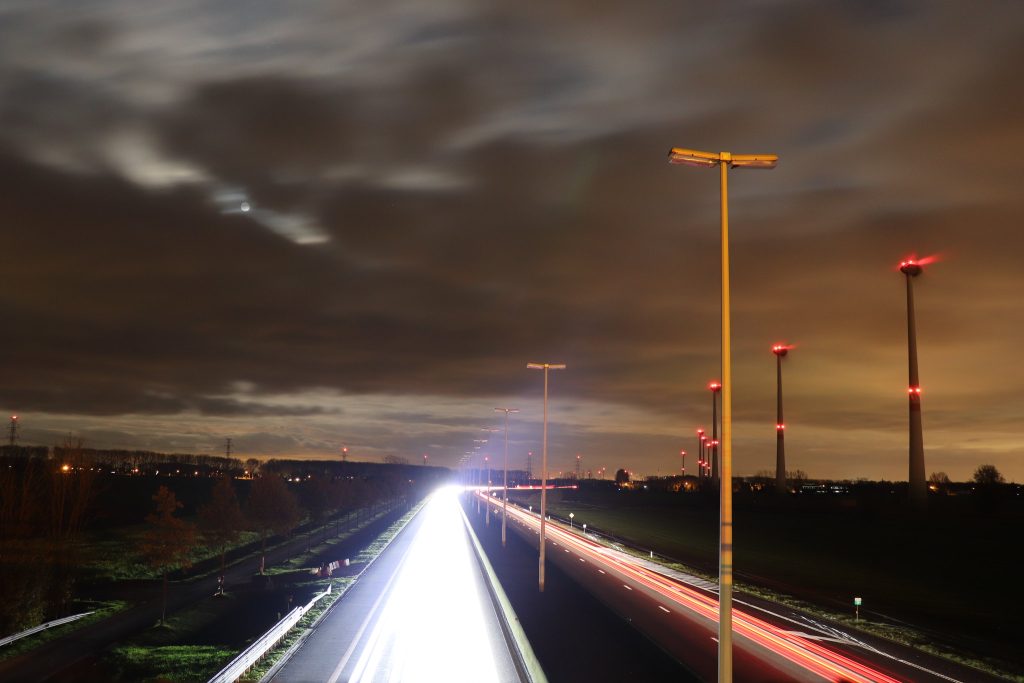
Image Credit: © julie_pierens/CC BY 2.0
Shooting with a low f/stop or large aperture means the camera lens is letting in more light. For that reason, the shutter mustn’t necessarily stay open for longer to adjust to the correct exposure. That automatically amounts to a faster shutter speed.
On the other hand, shooting with a high f/stop or small aperture means the camera lens is allowing less light to pass through. For that reason, the shutter must stay open for a little longer to find the right exposure. That effect amounts to a slower shutter speed.
How do you adjust your camera’s aperture?
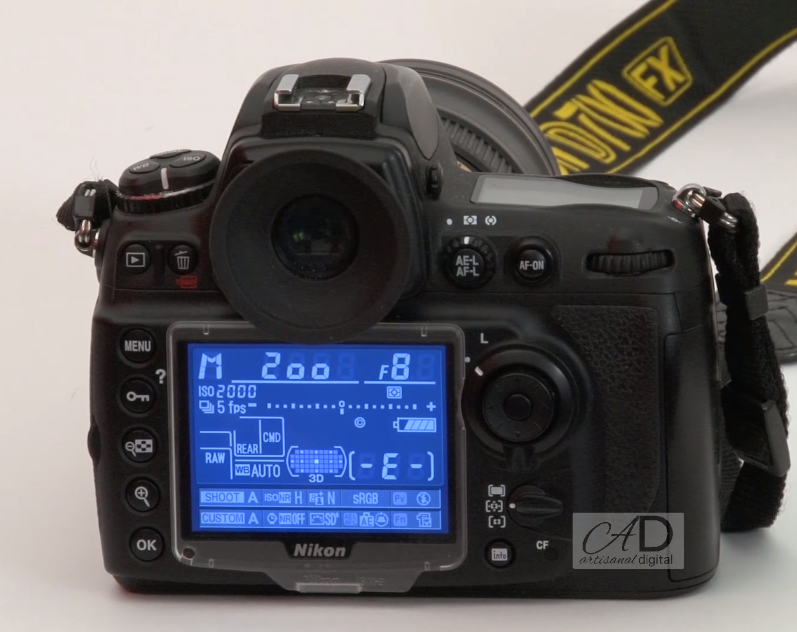
With the right understanding of f-stops and f-numbers, adjusting the aperture of your camera becomes a breeze. The f-stops help you describe the aperture size for a given photo instead of just terming them ‘large’ and ‘small’.
To adjust the aperture correctly, set the shooting mode of your camera to either Aperture Priority or Manual modes. Aperture Priority mode is typically denoted as ‘A’ or ‘AV’ on most cameras whereas the Manual mode is denoted as ‘M’. Start by checking the camera’s top dial for the right mode.
Setting the mode to shoot with should be followed by the rotation of the appropriate camera dial to adjust f-numbers accordingly. With that simple exercise, your aperture is all set and ready for the next shot.
Remember, in Aperture Priority mode, you set your preferred aperture as the camera automatically determines the corresponding shutter speed. The Manual mode allows you to manually determine and select both the shutter speed and aperture.
Besides being an excellent learning tool for beginner photographers, the Aperture Priority mode is also most ideal when capturing consistently fast shots in a consistently lit scene and don’t have enough time to keep adjusting your settings.
How do you choose the right aperture?
Now that you know how to control exposure and depth of field, what dictates your decision of the choice of aperture?
Well, there is no one-size-fits-all aperture or a single best aperture for all kinds of shots. Sometimes you will need a narrow aperture to obtain a deep depth of field or darken an extremely bright shot. Other times you may need to work with a wide aperture to obtain a shallow depth of field or brighten up an extremely dark shot.
Despite the lack of a specific rule of thumb for the best aperture, there are popular apertures that work best with certain scenarios as highlighted below:
· What is the right aperture for portrait photography?
Portrait photography has a single focus on the main subject of the scene, be it the head, eyes, or shoulders. The aim of this technique is to isolate the subject from its surroundings by applying selective focus. This reduces background noise or distraction by a huge margin while making your subject stand out appealingly.
To achieve this style, you should shoot with a large aperture or lower f/stops say f/2 or f/2.8. These apertures result in a very shallow depth of field bringing only the subject or just a section of the subject in sharp focus. This effect is what pulls your viewer’s attention to the main subject.
It has become a common practice among many headshot photographers, portrait photographers, as well as fashion photographers.
· What is the best aperture for landscapes?
Small apertures or higher f/stops like f/8 or f/11 appeal to many landscape photographers and for a good reason. These apertures are excellent at producing maximum depth of field that further yields as much photo detail as possible stretching from the foreground to the background.
Whether you are capturing sweeping shots of the sky, sea, or land, you want your shots to remain sharp throughout. The sharper the shot is, the more detailed it becomes. The viewer then gets to marvel at both the glamour of the scene as well as the level of detail in it. It’s almost like inviting them to step into the natural-looking scene.
· What is the best aperture for mid-range depth of field?
So, you are trying to avoid either aperture extremes in your shots, which way? Well, if you don’t want to shoot with a maximum or minimum depth of field, you can always opt to meet both aperture extremes halfway or shoot with a depth of field of intermediate scale.
That means you will be targeting your focus on a particular distance range within the photo. You can successfully achieve this by selecting a mid-range aperture setting like f/5.6 and starting off with a test frame shot. Using the magnifying feature of your camera, you can zoom in on the image and assess the depth of field achieved. That gives you some wiggle room to make any necessary adjustments to your settings and start reshooting.
Understanding maximum and minimum lens apertures
Each camera lens comes with a unique aperture limit. The limit tells you how high or low the aperture can go. If you keenly observe your lens, it should clearly stipulate its maximum and minimum apertures. This is a great deciding factor when shopping for a new camera or an additional lens.
That said, most pro photographers only concentrate on the maximum aperture. The maximum aperture is what dictates how much light your lens will allow into the sensor at its pinnacle. In other words, it tells you the extent of dark environments you can shoot in.
The maximum aperture of a lens can affect its cost in the market because of functionality dynamics. For example, a lens with a maximum aperture of f/1.4 is termed a fast lens because it lets in more light. In contrast, a lens with a maximum aperture of say f/4 is considered a slow lens because it lets in relatively less light. Therefore, the f/1.4 aperture lens will cost more than the f/4 one because it has a larger aperture.
Minimum aperture is not a major consideration during camera or lens purchase because most modern cameras come with a fixed minimum aperture at f/16. For your routine photography, you will hardly ever need a minimum aperture smaller than f/16.
When shooting with a zoom lens, the maximum aperture changes when you zoom in and out. For example, an 18-55mm zoom lens with a maximum aperture range of f/3.5-5.6 indicates the maximum aperture can shift from f/3.5 to f/5.6 as you zoom between the two focal lengths. Other more powerful zoom lenses come with a constant maximum aperture for their entire zoom range.
When shopping for lenses, realize that prime lenses come with larger maximum apertures compared to zoom lenses hence offering better value for money. Sometimes the maximum aperture is weaved into the name of the lens you are buying and may feature as a slash (f/1.4) or a colon (1:1.4). However, when you bump into a colon calibration, don’t panic because they both mean the same thing.
What are the different apertures and their uses?
You have come a long way in your understanding of aperture in photography. You have learned how aperture works and the way it affects your photos.
So, as you adjust your camera’s f-stops, how does the application of aperture function? Let’s take a look at a few examples.
· f/0.95 to f/1.4
This aperture range falls under fast lenses. The range represents maximum apertures commonly found in prime lenses. They allow in as much light as possible making them an ideal choice for especially low-light photography.
You can use these maximum apertures for indoor photography such as corporate events, wedding receptions, or capturing the night sky. The apertures are wide enough to let in more light and afford you an extremely shallow depth of field ideal for close-ups that separate the subject from its background.
· f/1.8 to f/2.0
These maximum apertures provide slightly inferior shooting performance in low-light conditions. That said, they still add great value when capturing appealing shots. Shooting with these apertures helps you obtain ample depth of field for close-up subjects that yield an elegant bokeh blur which you can find out more about here.
· f/2.8 to f/4
This is the most versatile range of maximum apertures. While they may come with a less powerful ability
to gather light, they afford you excellent image stabilization for the best shots even in low-light scenes.
Within this range of maximum apertures, you still get enough depth of field for almost all your subjects to yield exceptional image sharpness. They are commonly applied in wildlife, sports, and travel
· f/5.6 to f/8
These mid-range apertures blend well with most architecture and landscape photography scenarios. Within this range, you can also find some of the most appropriate aperture settings for taking shots involving large groups of people. Most lenses reach their ideal sharpness at f/5.6 and f/8 when the scene demands more depth of field.
· f/11 to f/16
This aperture range is also ideal for architecture, landscape, as well as macro photography. Such scenes demand greater depth of field to capture the most details. That said, when you go beyond f/8, the sharpness of your images may start getting compromised as a result of lens diffraction.
· f/22 and smaller
These smaller apertures work well with a skilled photographer. Within these apertures, the integrity of your image sharpness suffers greatly. You should only use them less often when you are certain of your goals. To achieve more depth of field, you would rather move away from your subject than compromise image sharpness.
Common aperture FAQs
At what aperture does my lens allow in the most light?
The most light for your shots can only be achieved at a maximum aperture like the f/1.4. This is when the lens opening is at its widest.
At what aperture does my lens allow in the least light?
This is the reverse of the previous scenario. You can expect the least light into your camera when shooting with a smaller aperture like f/22. With this aperture, the lens opening is very narrow letting in only minimal light to pass through.
What is the best aperture for a blurry background?
The trick to achieving a nice blurry background is opening up the lens to its maximum aperture while getting as close as possible to your subject.
For example, if you are using a prime lens with a maximum aperture of f/1.8, capture your subject at f/1.8 and a close distance. If it’s a zoom lens say 18-55mm f/3.5-5.6, ensure you zoom in completely to the longest focal length while setting the widest aperture. While at it, make sure you are the closest you can get to your subject. That means zooming all the way to 55mm and shooting at the maximum aperture of f/5.6.
Higher vs lower aperture, which is better?
Answering this question comes down to your personal preferences. What are you shooting and what do you expect the end result to look like?
The general understanding you should possess is that larger apertures like f/1.4 let in more light hence yielding a shallow depth of field. In contrast, smaller apertures like f/16 restrict the amount of light entering the lens hence producing a larger depth of field. Each of these apertures can find different applications in photography depending on what you are after.
What are Starburst and Sunstar effects?
These are simply beautifying elements in certain photos you capture. To achieve these effects in your shots, focus on a tiny, bright point of light like the sun. Make sure it is partially obscured and use a small aperture such as the f/16 for the strongest starburst effect.
The number of your aperture blades determines the type of starbursts you end up getting. Of course, this may vary from lens to lens. A lens with 6 aperture blades, for example, yields 6 sunbeams and one with 8 aperture blades will yield 8 sunbeams, and so on.
That said, lenses that come with an odd number of aperture blades yield twice the number of sunbeams. That’s because, for an even number of aperture blades, the sunbeams overlap each other unlike in the odd-numbered aperture blade lenses. So, if you are shooting with a lens having 7 aperture blades, expect to get 14 sunbeams and so on.
Besides the number, the shape of your aperture blades also plays out when creating the starburst effect. When aiming at producing more pronounced and defined light rays, straight aperture blades deliver a greater performance compared to their rounded counterparts.
What is lens diffraction in photography?
Diffraction occurs when you lose some bit of your image sharpness because of shooting at extremely small apertures. This defeats the purpose of landscape photography that places a huge premium on sharpness.
If you decide to use a smaller aperture setting like f/32, you are in effect squeezing the amount of light passing through to your camera. The light then becomes progressively blurrier ultimately compromising the sharpness of your photos.
The basic physics understanding supporting this effect is that as the aperture increasingly grows smaller, light waves begin to spread out more hence interfering with each other’s path. This affects the small details of your images causing them to blur.
That means at apertures beyond f/22, you can lose a significant amount of detail in your photos. However, when shooting at apertures like f/11 or f/16, don’t be afraid of diffraction. It is worth considering the tradeoffs that come with these apertures such as the extra depth of field. In other words, you would rather sacrifice some little sharpness in exchange for incredible depth of field.
What are the effects of a small aperture?
Generally, smaller apertures:
- Darken your photo
- Increase the depth of field of your shots
- Increase diffraction
- Intensify the starburst effect
The opposite is also true for larger apertures.
Why does aperture matter in photography?
Just like your eye is functionless without the pupil, the camera loses its worth without aperture. So, as a photography enthusiast, mastery of aperture and how it affects your photos will largely assist you in getting excellent shots under varying shutter speeds and environments. This will ultimately afford you a solid edge over your fellow photographers.
In other words, a deeper understanding of aperture will serve to enhance the overall quality of your photos.
Final words on aperture
Hopefully, you are now out of the woods as far as aperture complexity is concerned. You have just leveled up your photography knowledge (and probably, prowess too!). You now know how to leverage aperture for the best professional-grade shots. At this level of upskilling, you are unstoppable.
In case you are still wallowing in some confusion, however, don’t fret. Develop deeper intimacy with your camera and start experimenting more. Look for a desirable subject and take as many shots as possible using different apertures. Observe the changes in the depth of field and pick a lesson or two from your findings.
Sooner than later, you will get the hang of it and your photos will turn into the envy of other photographers. You know why all that is possible? Because nothing beats the powerful combination of the right theoretical knowledge and solid on-the-field experiments. Good luck becoming an aperture-pro photographer!

About Author
Connor Kovack is a Los Angeles based professional photographer & videographer with over 6+ years of experience. Connor is CEO of KovMedia and specializes in Music Videos, Commercials, Photography & More.
