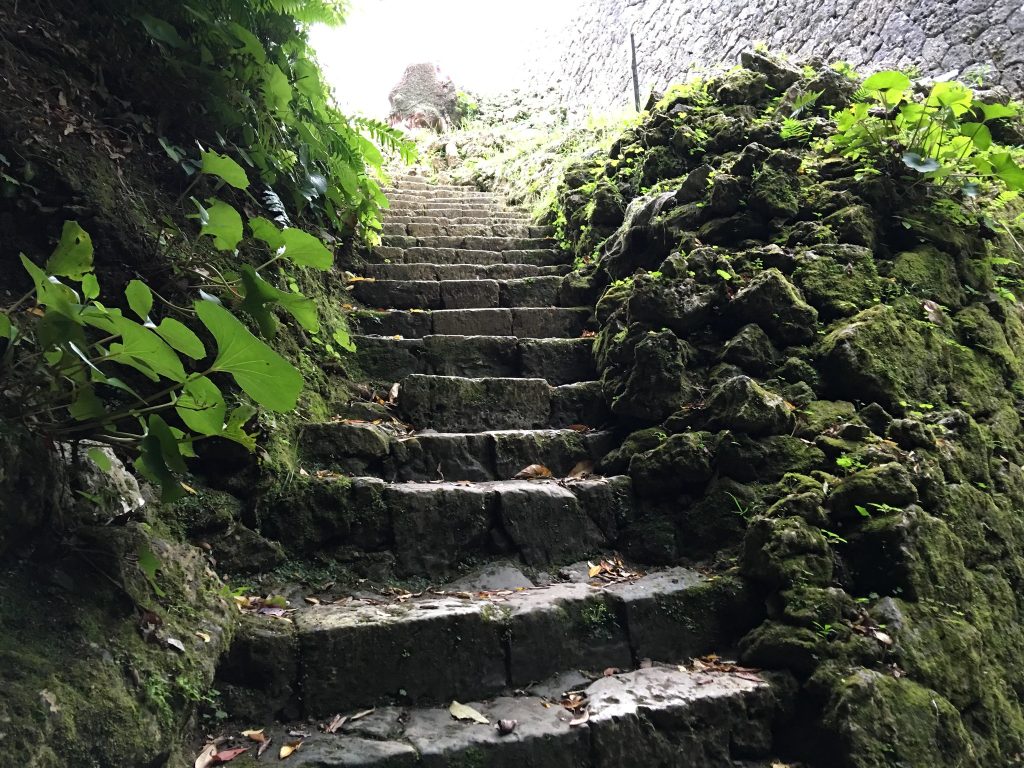
A great photo is one that’s full of depth and detail. And if you’re shooting in black-and-white, the contrast between light and dark areas can be just as important. But when it comes to achieving a powerful photograph, there are two key elements: leading lines and negative space. Leading lines are the visual guideposts that draw your eye into or through an image so it can explore beyond what would otherwise be its natural boundaries. Negative space refers to all the “empty” parts of a picture–the parts not occupied by any significant part of the subject matter. Together they create balance in photographs, which helps them tell their story more clearly, while also adding emotional weight to images.”
What are leading lines in photography?
Leading lines are the visual guideposts that draw your eye into or through an image so it can explore beyond what would otherwise be its natural boundaries.
They can be created by any number of features in a scene, such as roads, fences, rivers, and buildings. But leading lines don’t have to be physical objects–they can be created by the way elements in a scene converge. For example, suppose you’re shooting along a straight piece of road, and there’s an oncoming car or person about to cross it at some distance away from your camera position. In that case, that distant object becomes a leading line even though it’s not physically part of any visible structure.
Difference Between Paths and Leading Lines
Two types of paths are commonly mistaken for leading lines: roads and rivers. Roads, particularly those that run straight through a landscape or cityscape, can be quite effective as leading lines because they often literally point the way to the subject matter. But if you overuse them too much, they become boring–and may even detract from your photo’s impact.
Rivers can be effective leading lines, but only if they’re rendered as a strong element of the whole scene. In other words, it’s all about context–a river may help lead your eye into or through an image from one side to another quite well. But as an isolated feature, it lacks visual power and will fail to add any real impact to your photo.
The best leading lines are rarely the most obvious ones–they’re more often the ones that stand out less. That is, they don’t draw attention to themselves because they simply form a part of what’s already familiar in any given scene or composition–elements like roads and rivers may be familiar enough, but their power as leading lines is only realized when they’re used in the right way.
In photography, there are four different types of leading lines.
Understanding the different types of lines used in photography goes along to put you at an advantage when you’re out shooting landscapes, buildings, and other scenes. The four types of lines are:
Contents
Straight leading lines

A straight line can be the most powerful type of line in a photograph. This is because it’s so rigid and unforgiving, providing a strong visual contrast to the surrounding environment. They can lead your eye deep into the frame and create an intense sense of depth when used correctly.
Straight leading lines are often found in cityscapes and landscapes, where the camera is looking down on a scene from a high angle. This type of perspective makes the lines even more powerful because they appear to stretch out into infinity.
One way to use straight leading lines in your compositions is to find an interesting vantage point that allows you to see them in multiple directions. For example, when shooting a cityscape, you can use the lines created by tall buildings to draw your viewers into an image.
Another way is to simply place them in front of another element that’s more dominant or important within the scene–the power of straight lines will be drawn out because they’ll have something powerful next to them.
Curved leading lines

Curved lines are often subtler than straight lines and can be used to create a sense of movement within an image. They’re particularly effective at leading your eye around the frame, providing visual interest that helps keep viewers engaged with the photo.
Curved lines can be found in many different places but are most commonly found in urban and landscape scenes.
One of the most effective places to find curved lines is along roads, where they’ll often converge at a vanishing point on the horizon line. If you’re not careful with this type of leading line, it can become very distracting because your eyes will be drawn all over the place–so make sure that wherever your subject matter is along the road, it’s easy to find.
Another effective place for curved lines is rivers. These can also be very distracting if placed incorrectly, but they create an interesting flow through a scene when used correctly.
Curved lines are often best not as straight-on as possible because this creates more of a winding effect–if you want to use them in this way, try tilting your camera to give a more dynamic perspective.
Diagonal leading lines

Diagonal lines are perhaps the most commonly used type of line in photography. They’re very effective at drawing attention to the important subject matter within a scene–but you have to be careful with them because diagonal lines can also create tension. This is especially true if they run directly through your main focal point, which may make for an uninteresting photo
Diagonal lines can be found in both natural and urban landscapes and are often used to lead the viewer’s eyes towards the horizon line. When used correctly, they can give an image a sense of dynamism and movement.
One way to use diagonal lines is by placing them against a strong vertical or horizontal line. This will create a visual contrast that helps to highlight the lines themselves.
Another way is to use them as leading lines towards your subject matter. This can be very effective if you have a strong and interesting subject in your image’s foreground.
Horizontal leading lines

Horizontal leading lines are the best way to draw your viewer’s eyes out into a scene and provide an intense sense of depth. They work by receding towards the horizon line, so they’re often used in landscape and seascape photography. These types of images tend to be very featureless–because you want viewers’ attention focused on the subjects in your image–so if you can use horizontal lines to create a sense of depth or distance, it will help make the scene more interesting.
One way to do this is by finding an area where there’s some sort of structure along these receding lines. This could be anything from trees and rocks that gradually get smaller as they recede into the distance to a dock, with people gradually getting smaller as they move away from you.
This type of leading line is also effective at drawing attention towards your horizon line–an area that will be important in almost every landscape photo because it’s where the sky meets land. To make this more obvious and prominent within an image, try tilting your camera to make this line more obvious.
How to use leading lines
1-Find a leading line: This can be done by looking for curved, diagonal or horizontal lines in a scene.
2-Incorporate that leading line into your composition: Place it in a way that will lead the viewer’s eyes towards your subject matter or the horizon line.
-Be careful not to use leading lines too much, as they can become distracting if used incorrectly.
-Try tilting your camera to give a more dynamic perspective when using curved lines.
-Use diagonal lines against strong vertical or horizontal lines to create a contrast.
-Horizontal leading lines effectively create depth and distance within an image.
-Placing these types of lines against structures is one way you can incorporate them into your composition successfully. Please note that not all images have the same goal, which is why it’s important to be flexible with styles and techniques when taking photographs.
Tips for Using Leading Lines in Your Photography
1) Put yourself in the best possible position
Try to get yourself into a position where you can use the leading lines in your scene. This might involve getting down on the ground and shooting up at an object or climbing onto something like a hillock to photograph downhill.
Figure out which way you want your viewer’s eyes to go by seeing what naturally draws their attention and use that to your advantage.
2) Figure out what your focal point will be
Even if you have a great leading line, it won’t mean much if nothing is interesting at the end of it. Make sure to pick a focal point that will be worth the journey for your viewers.
This might be something as simple as a beautiful landscape in the distance or an interesting subject matter in the foreground of your image.
3) Make adjustments based on the lighting
Leading lines can be even more powerful if used in conjunction with good lighting. When the sun is behind you, it will help to create a sense of depth and distance within your image.
Conversely, when the light is in front of you, it will help to bring out details in foreground subjects. Be sure to take this into account when you’re shooting.
4) Take note of any natural lines
Try to pay attention to the natural lines that already exist in your scene. You can use these as leading lines by playing around with angles and perspective, much like you would when be using man-made objects or structures within an image.
5) Take several pictures
Don’t be afraid to take a few different shots of the same scene from different angles and perspectives. This will give you more options when it comes time to edit your photos later on.
Leading lines can be an extremely powerful compositional tool in photography–use them wisely, and they’ll help to lead your viewers’ eyes directly to your focal point. By following these tips, you’ll be able to create photos with a real sense of depth and power.
6) Consider the time of day and the place
The time of day and the place where you are taking photos can also impact how leading lines will be used in your shots. For example, if you’re shooting during the golden hour, the sun will act as a natural leading line.
Similarly, photographing near water or other reflective surfaces can create a sense of depth because it will mimic lines in the landscape.
In this case, pay attention to how you’re using natural reflections as a leading line and use them where appropriate.
Why are leading lines important?
Leading lines help draw your viewers’ eyes directly to where you want them to look. This can be a powerful tool in enhancing the composition of an image, and it should not be overlooked when learning how to shoot landscapes or other outdoor scenes.
In many cases, leading lines will also have symbolic meaning behind them because they represent the path your viewers should follow to reach their final destination.
Using leading lines effectively guides people’s attention when you want them looking at a particular object or focal point within your image. By following these tips, you’ll be able to incorporate this compositional element into your own landscapes and other outdoor scenes with ease.

About Author
Connor Kovack is a Los Angeles based professional photographer & videographer with over 6+ years of experience. Connor is CEO of KovMedia and specializes in Music Videos, Commercials, Photography & More.
