Key points
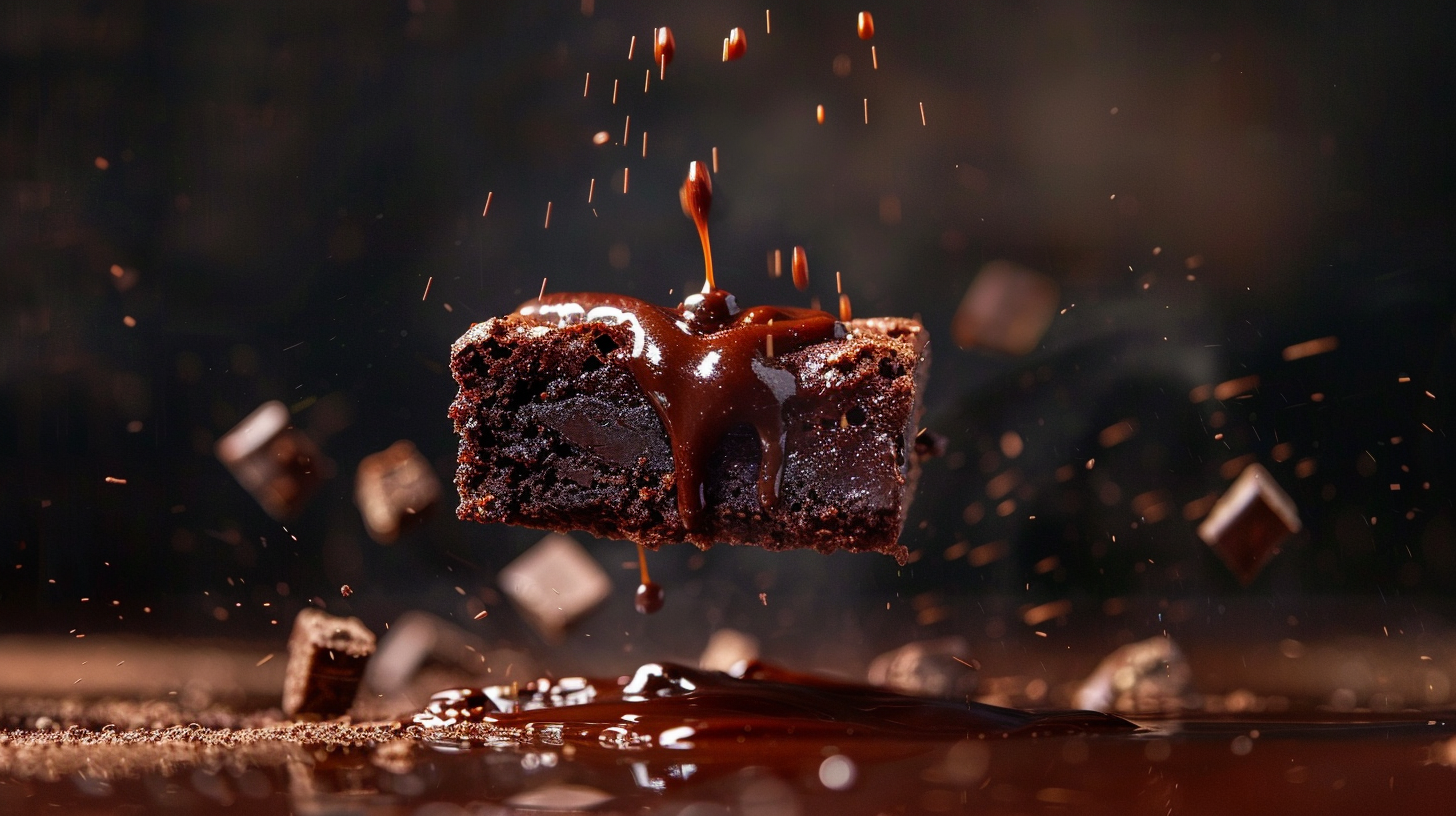
• Lighting: Good lighting is a must for snapping photos of brownies. It brings out their rich textures and shiny tops. Whether you’re taking advantage of daylight or using studio lights, make sure to show off the details and shadows that give the chocolatey treat its depth.
• Styling: The way you style your brownies can really make your photo pop. Throw in some extra goodies, like drippy chocolate, crunchy nuts, or a dusting of sugar to add some eye-catching elements and give folks an idea of how delicious they taste.
• Composition: How you arrange your photo should lead eyes straight to those brownies. You can try some tricks like the rule of thirds, lines that draw you in, or surrounding the sweet with props to make a photo that’s both interesting and neatly put together – all while keeping the spotlight on the brownies.
Contents
- Key points
- The Importance of Food Pictures in Baking Recipe Books
- The Role of Visual Appeal in Brownie Presentation
- Understanding Lighting and Its Effects on Brownie Textures
- The Importance of Angle and Composition in Brownie Shots
- Selecting the Right Equipment for Brownie Photography
- Techniques for Enhancing the Visual Appeal of Brownies
- The Use of Props and Backgrounds in Brownie Photography
- Color Theory and Its Application to Brownie Images
- Taking a Closer Look at Brownie Details
- Editing Tips for Brownie Photos
- Taking Great Brownie Photos
- Using Photos in Recipe Trials
- Guide to Baking with Photos
The Importance of Food Pictures in Baking Recipe Books

Picture yourself browsing a recipe book, trying to find a good brownie recipe. It’s usually not the ingredients or steps that grab your attention, but the tempting photo of the brownies. Top-notch photos are super important in recipe books because they show what you’re aiming to make. They help and motivate us when we’re baking at home. Plus, awesome pictures make a recipe book stand out and boost sales; folks tend to go for books with eye-catching pics.
The Role of Visual Appeal in Brownie Presentation

We eat with our eyes first, and that’s true for simple treats like brownies. Good photos capture how food actually looks and feels. For brownies, that could mean showing off a moist middle or the shine on glazed chocolate. Whether it’s in a restaurant, a bakery, or online, mouthwatering photos tend to make people want to buy. You have to present well — no one will notice how tasty your brownies are if they don’t look good in pictures.
Great pictures can make brownies too tempting to resist. To take such pictures, you need to know a couple of things. Lighting highlights textures and makes the brownie’s details pop, while the angle and setting make it look yummy.
Understanding Lighting and Its Effects on Brownie Textures
When you photograph brownies, lighting matters a lot. Soft, spread-out light brings out the shiny glaze or crumbly edge. Sideways light can make the cracks look deep, which gives the brownie a cool 3D effect. But be careful with dark shadows; they can hide things. Sometimes, using reflectors to light up your food from different sides can soften shadows and show off the textures better.
The Importance of Angle and Composition in Brownie Shots
The right perspective is crucial. Looking down from above is perfect for spotting textured toppings or designs. A side view shows off layers inside the brownies. When arranging your shot, make sure the background matches your brownies and doesn’t distract from them. And think about extras like forks or napkins that can guide the eye or tell a story.
Selecting the Right Equipment for Brownie Photography
Even though high-quality cameras are great, don’t knock smartphones; they can do wonders in good light. Whatever you choose, use a sharp lens, and maybe a tripod to stop shaky pics, especially when it’s dim. Macro lenses are awesome for detail shots, while regular lenses give you a true-to-life picture without weird bends.
Taking snaps of brownies is all about making them look irresistible so people feel like they can taste that rich chocolate just by seeing it. There are some smart moves for making your brownies camera-ready and look their best.
Techniques for Enhancing the Visual Appeal of Brownies
Here are some tricks to make your brownies look even more delish on screen:
- Pick out the prettiest pieces. Shiny tops, crunchy sides, and lots of choco chips stand out as fresh and rich.
- Cut them neat to show off that soft, gooey part. Clean your knife after every cut for tidy edges that highlight the fudgy inside.
- Pile them up or arrange them in layers for a photo with more “oomph” that draws the eye in.
- Add extra toppings like sugar dust, nuts, or drizzly sauces right before taking the shot to mix in something new.
The Use of Props and Backgrounds in Brownie Photography
Your choice of props and backdrops plays a big part too. They should make your brownie pics even better:
- Go for props that match but don’t hog the spotlight — wooden boards, old-timey spoons, or fancy plates work nicely.
- A contrasting but complimentary backdrop can either highlight a brownie’s gloss or set a cozy scene.
- Keep it simple so that nothing overshadows your main attraction — too much stuff around gets messy.
Color Theory and Its Application to Brownie Images
Playing with colors is another trick:
- Pick colors that make each other pop — brownies’ rich browns stand out against cooler shades like pale blue or green.
- Think about warm vs. cool colors; warm ones feel homey, while cool ones are sleeker and more modern.
- Using various browns can put the focus on the chocolatey goodness for an elegant vibe.
Making choices on things like props and color schemes is key to amazing brownie photography. Keep these pointers in mind for snapping a shot that mixes creativity with tech skills.
Taking a Closer Look at Brownie Details

Highlighting the small but significant features of a brownie can make your pictures more captivating. With macro photography, you dive in close to show off the tempting textures and elements that brownies are famous for. To start, grab a macro lens for these detailed shots. Mount your camera on a solid tripod to keep it still; even a tiny wiggle can ruin a macro photo. If you can, use natural light to enhance the details, but if not, go for a gentle artificial light. Focusing closely on certain parts of the brownie, like its crinkly top or melty middle, can elevate a decent photo to an exceptional one.
Editing Tips for Brownie Photos

After taking your brownie photos, the next thing to do is edit them. This means using a photo editing program to adjust lightness, darkness, and color intensity so that those brown hues really stand out. You can also use tools to sharpen the image – this brings out details in the texture of the brownie. But be careful not to overdo it; too much sharpening can make your photo look fake. Darkening (burning) or lightening (dodging) parts of the picture can highlight certain areas and make them more noticeable. Filters can be fun to play with, but try not to go overboard. You want to keep that delicious appearance intact.
Taking Great Brownie Photos

Every photo can share a story, especially when you’re snapping shots of brownies. Set up your scene with items that go well with brownies, like steaming cups of coffee or chilly milk glasses. Even spreading out the ingredients neatly can add to your picture. The setup in your photo creates an atmosphere, whether it’s snug and homey or fancy and decadent. To bring your viewers into the moment, try taking an action shot – like dusting the brownies with sugar or slicing them up. This helps people feel connected to your photos on an emotional level.
Using Photos in Recipe Trials

Taking pictures while you make a recipe is key. It helps people copy what you’ve done. When making brownies, photos are a big help. Take pictures of everything: picking out what you need, putting them together, cooking, and of course the finished brownies. Pictures are like a map – they help keep your baking consistent, especially when you’re tinkering with how long to cook them or how much stuff to put in. But don’t just click away without a plan. Think about where you stand and the light so that those brownies really look good.
Guide to Baking with Photos

Photos can make baking much easier. They show you what to aim for, like the perfect brownie with a crackly top and gooey inside, which is tough to explain in words. Take close-up pictures of the mix’s look and the top as it bakes. Use these pictures to know when it’s just right. Sharing photos with your recipe can also help others bake delicious treats.
A good collection of brownie pictures can really push your baking skills forward. Great snaps can draw people to your biz or blog. Start with several pictures that show off your brownies’ texture, size, and special toppings.
Choosing Top Brownie Pictures for Your Collection
Pick only the best pictures for your brownies. You want clear shots that show off the chewy middle and crisp edges. Good light is critical; sunshine can really make each piece pop. Make sure every picture makes the brownies look so tasty that people want to grab one right off the screen.
Putting Together Brownie Photos for Showing Off
When it’s time to organize your pictures, think about telling a story. Set up the images so they take people through your baking steps or show different kinds of brownies. Keep the style and light consistent in all photos for a smooth look, and group them by theme or from simple to fancy setups.
Using Brownie Photos to Boost Marketing and Sales
Brownie photos are more then just nice to look at—they’re strong marketing tools. Show off your baking skills with these photos on social media or your site to get customers interested. With the right approach, great pictures lead to more interest and sales. Place your photos smartly for the biggest effect—like a standout photo on your menu or in an advertisement can really get people’s attention.

About Author
Rachel Noël is a professional photographer and videographer from the UK with over 10+ years of experience. Rachel specializes in Underwater, Tavel & Portrait photography among other areas.
