Or why does your camera flash turn them blue? Understanding the notion of white balance and how it functions is critical in digital photography. In turn, setting it wrong may damage a shot by adding unwanted color casts and making skin tones seem unnatural.
Unfortunately, most photographers do not devote enough effort to understanding how to deal with white balance and its related settings. When they see strange colors in their photographs, they do not know how to repair the problem, even though it is far easier than most people believe.
This detailed guide will discuss everything you need to know about white balance. We will also study the different presets accessible on all digital cameras to help control the color temperature of your pictures.
Contents
- The Definition of White Balance in Photography
- Color Measurement and Temperature
- What Impact Does Light Have on Color in Photography?
- Importance of Adjusting White Balance
- White Balance In-Camera Preset Options
- In-Camera White Balance vs. Post-Processing
- Tips for Using RAW File Format for Precise White Balance
- How to Adjust White Balance in Post-Processing Software
- How to Use White Balance in a Creative Manner
- How to Use White Balance in your Digital Camera
- Conclusion
The Definition of White Balance in Photography
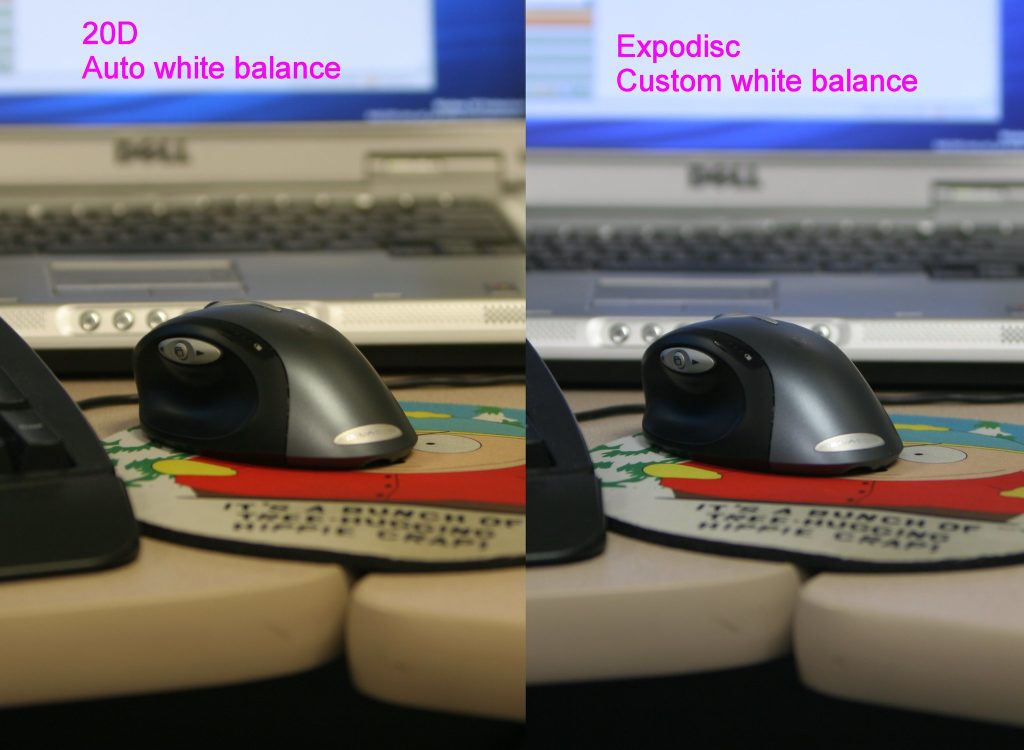
The image on the right has had its white balance adjusted correctly for the shooting environment.
Image Credit: © Bob Reck/CC BY-NC-ND 2.0
White balance (WB) is the act of eliminating unnatural color casts from your photos. In turn, white items in real life appear white in your photograph. The “color temperature” of a light source, which relates to the relative coolness or warmth of white light, must be considered while white balancing a camera.
Our eyes are quite adept at discerning white under various light sources. But digital cameras have a lot of trouble with auto white balance (AWB), which can result in unattractive orange, blue, orange, or even green color casts. Learning digital white balance may assist you in preventing color casts, allowing you to take better images in a broader range of lighting situations.
Color Measurement and Temperature

It is time to learn how the white balance operates now that you know it. First, we must utilize Kelvin degrees to determine the color temperature of a photograph. We are particularly interested in the temperature range of 2000 to 10000 Kelvin degrees in terms of photography. Your picture will be warmer if the temperature number is greater. But what exactly does that imply?
If you are shooting in a bright and warm environment, you want to choose a white balance between 2500K and 4500K to balance the colors. If not, your picture will seem orange or red. On the other hand, if you are photographing in a cooler light condition, like during a cloudy sky, twilight, or blue hour, you should use a white balance ranging from 6500K to 9000K. In turn, this will help avoid the entire frame being filled with blueish tones.
You may use a color temperature of roughly 5000 to 6000K while photographing outdoors during the day. As such, this will help you shoot without a severe color cast. In essence, every camera on the market includes an automated white balance option. It allows the camera to choose the ideal white balance setting on its own. Every camera also offers several preset settings with preset Kelvin temperatures.
What Impact Does Light Have on Color in Photography?

1/13 second at f/1.8, ISO1600
The right photo shows a corrected white balance, as well as a speedflash, added.
1/200 second at f/1.8, ISO100
Image Credit: © Kevin O’Mara/CC BY-NC-ND 2.0
While this may seem like an odd question to some, you should be aware that light exists in various colors. However, take note that pure light is always white. The difference arises with many of the light sources you use when shooting (such as the lamps, the sun, and flash) do not generate pure white light. Instead, they have a variety of color casts. Even if you do not realize it, they impact the scene’s colors.
With practice, you will quickly know the light sources that emit warmer colors and those that emit cooler colors. In turn, this enables you to adjust your camera’s white balance properly.
Importance of Adjusting White Balance
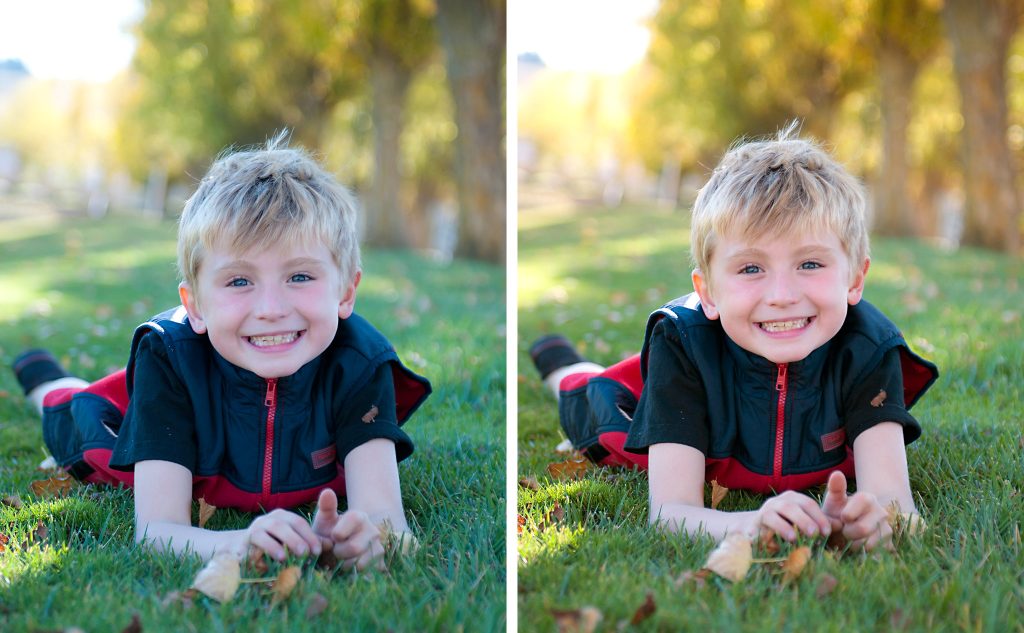
The right photo shows the effects adjusted white balance with aid of a Spyder Cube
Image Credit: © 707d3k/CC BY-NC-ND 2.0
Some say that a picture is worth a thousand words, which is true in some cases. Take a look at the picture above. On the right, the image is exactly as it was taken immediately from the camera. On the left, is the white balance adjusted using a Spyder Cube.
The original image has a cooler color cast that extends across the photo. This results from the camera’s misinterpretation of the image’s tone for warmth and attempts to compensate it with a colder color temperature.
White Balance In-Camera Preset Options
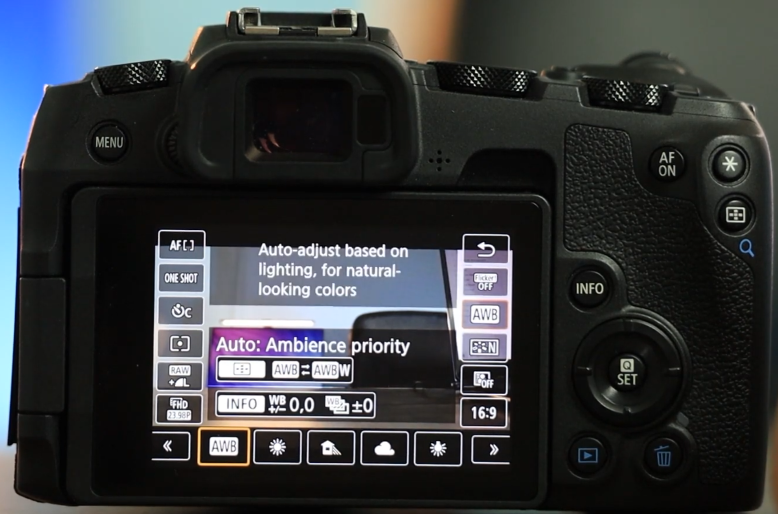
The ability to manually alter or set white balance is available on most digital cameras. “Shade,” “Sun,” “fluorescent,” and “tungsten” are common options. Some cameras even allow you to adjust the color temperature by selecting a Kelvin value manually. In the section below, we will review each setting to get more details on using them appropriately.
Auto White Balance (AWB) Mode
The automated option will essentially try to predict the scene’s correct white balance as the easiest to use. All you have to do is choose the auto white balance option, and you are ready to go!
There are two possible results when you take a photo with this setting:
- The white balance is going to be spot on. As such, you can continue using it.
- If the white balance is off, go to the settings and experiment with different options.
Sun/Daylight
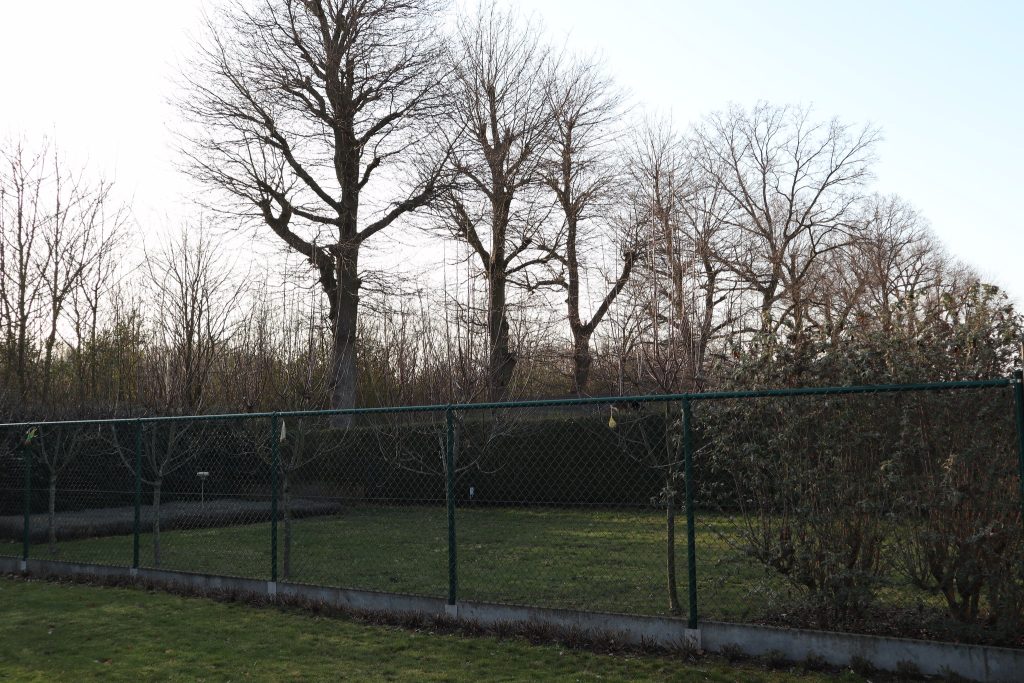
The daylight/sun mode is the best option to utilize while photographing outside throughout the day. It comes in handy when direct sunlight strikes the subject or shooting area. The white balance will be tuned to roughly 5000K degrees.
Tungsten
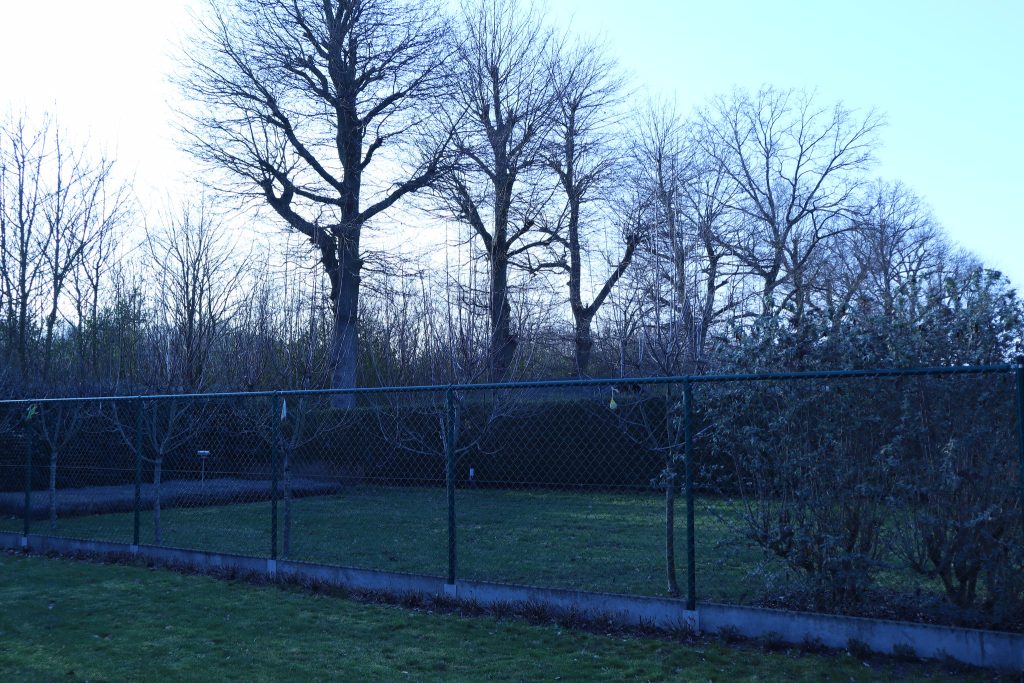
The tungsten setting will adjust your white balance to roughly 3000K. It is best to use it only when there are particularly warm light sources. These include candles, tungsten light bulbs, and so on.
Fluorescent
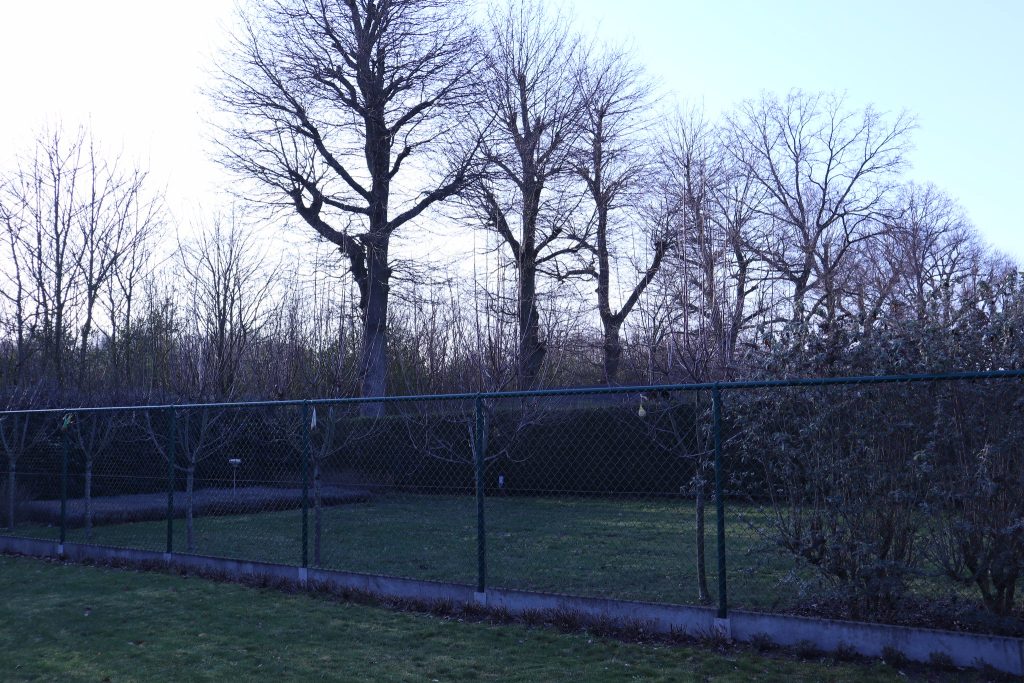
The fluorescent preset, which is slightly less harsh than the tungsten mode, will adjust the white balance in your digital camera to 4200K degrees. If the image seems overly orange, you can use this setting to counter strong warm lighting sources.
Cloudy
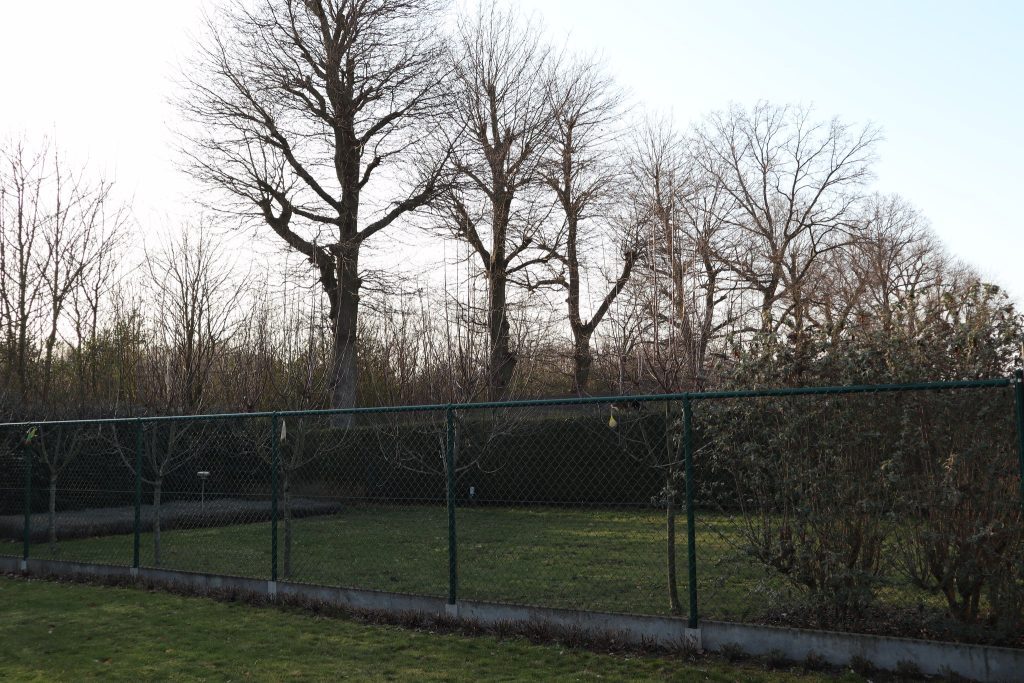
When photographing on cloudy days, you should use a more subtle white balance than shooting in bright sunlight. The overcast setting will raise your camera’s color temperature to 6000K, giving your photos an extra boost of warmth.
Shade
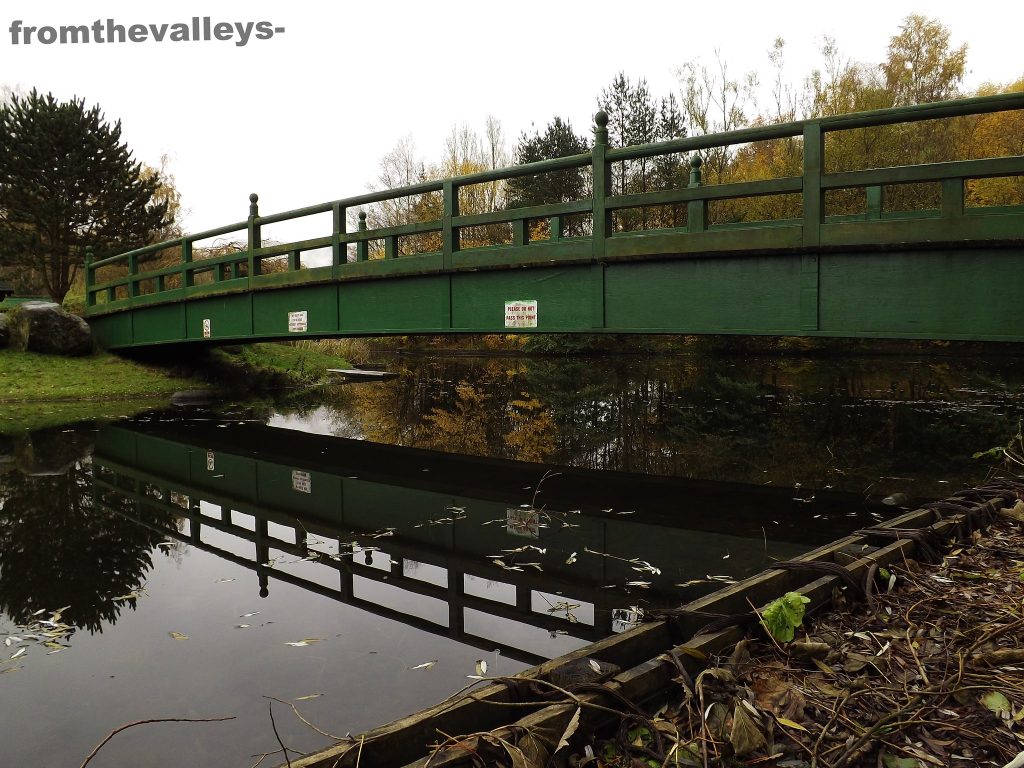
The shade setting changes the white balance of your camera to 8000K. In other words, it is the reverse of tungsten. This option can help you remove those undesirable blue tones and produce a more natural appearance. It is especially helpful to observe prominent cooler color casts in your photographs, typical of shaded regions or blue hours.
Flash
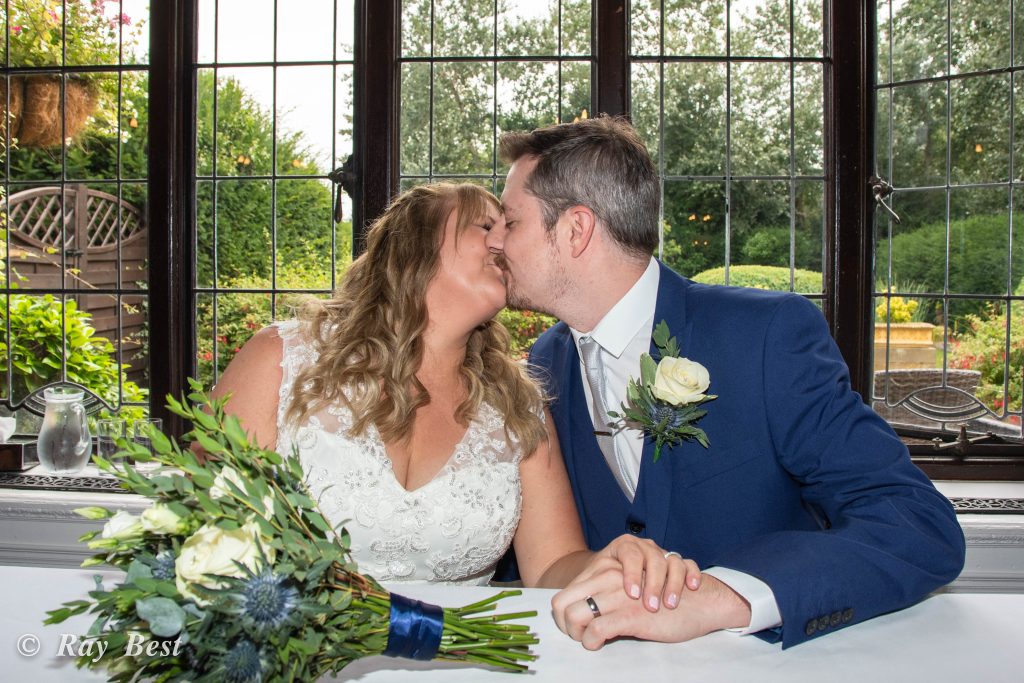
When you have a flashlight on your scene or subject, the flash setting is, unsurprisingly, the best to utilize. The camera’s white balance will reset to 5500K degrees when you select this option.
In-Camera White Balance vs. Post-Processing
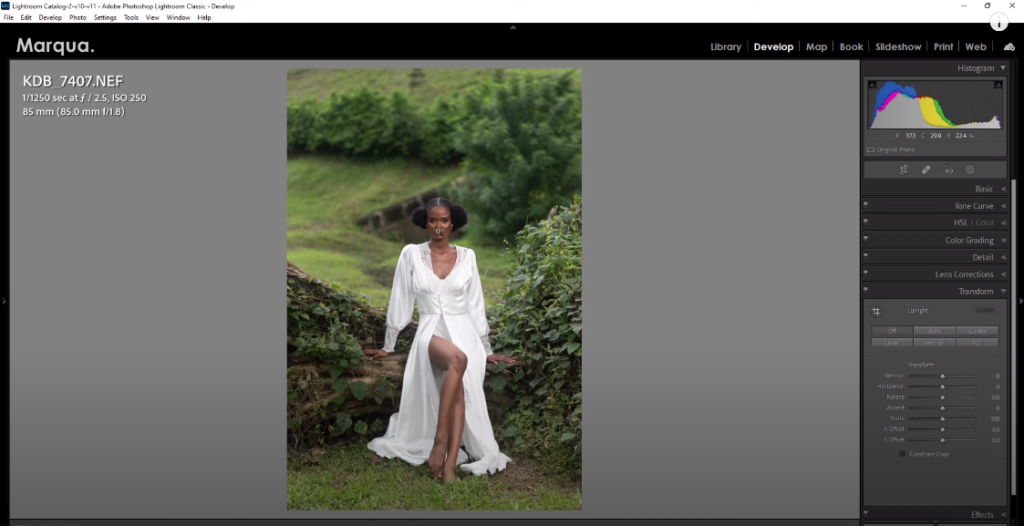
If you are familiar with photography, you probably know that you can modify the white balance of your picture in the field and post-production. However, many consider that in-field white balance adjustment is more fun and satisfying than post-processing.
However, it is common not to have enough time to regulate and alter the white balance for every photo you take in the field. The process of choosing the right white balance every time you change the direction of your light source or your composition is quite time-consuming. It is also common to find out that you have selected the wrong white balance after inspecting the shot afterward in your computer.
As a result, the next step highly depends on the image format you are using. Let us delve deeper into the different image formats available in digital cameras.
RAW File Format
RAW image formats enable you to post-process your photographs in any manner you deem fit. As such, you might as well keep your white balance preset on “auto.” In turn, this will enable your digital camera to cope with in-field color temperature. If the camera makes a mistake, you may adjust it afterward using a slider in editing software.
RAW files store the camera’s white balance and all of the additional data accessible in the field. This implies that no information or detail is lost if you modify the white balance during editing to be cooler or warmer. It will not damage the image or cause any quality loss. The only impact will be on color temperature.
JPEG File Format
When shooting in JPEG, things become a little more complicated. Because you will not edit your photos, you have to get the white balance right when you take the picture. Sometimes, your camera’s auto white balance setting will be precise. In other instances, you have to manually pick the Kelvin (if your camera allows it), or you will have to select from one of the presets.
You may also utilize white cards to adjust the white balance as most photographers did in the film photography heyday. To do so, lay a white card at the front of the lens to assist the camera in distinguishing between what is and is not white. It may then determine the optimal color temperature for the remainder of the picture.
Using white cards or adjusting the white balance manually in the digital camera requires plenty of time. It is much easier to correct it when using RAW file format and change it afterward in post-processing production.
Tips for Using RAW File Format for Precise White Balance
Many photographers enjoy shooting in RAW. You can do this for various reasons, one of which can adjust the white balance in post-processing production.
When shooting a RAW file, your camera evaluates and sets white balance as a reference. However, you may adjust this with Adobe Camera RAW, Adobe Lightroom, or any other RAW processing program.
However, if you shoot RAW, you cannot know how the lighting was established in the original scenario. Only the camera’s perception of it is seen. RAW files allow you more flexibility when it comes to post-production. When shooting RAW, you can opt to:
- Take your shot on Auto mode
- Use the white balance presets available on your digital camera.
- Take the picture in custom white balance mode. However, you must use a grey card and it usually has a learning curve.
- Use a light temperature meter, although it can be quite expensive
- Selecting a Neutral Reference during Custom White Balance
A neutral reference is widely employed for color-critical jobs or scenarios where auto white balance is likely to fail. If you are lucky enough, neutral references can be a part of your setting. They can also be mobile objects that you take with you. Below is an example of a lucky neutral reference
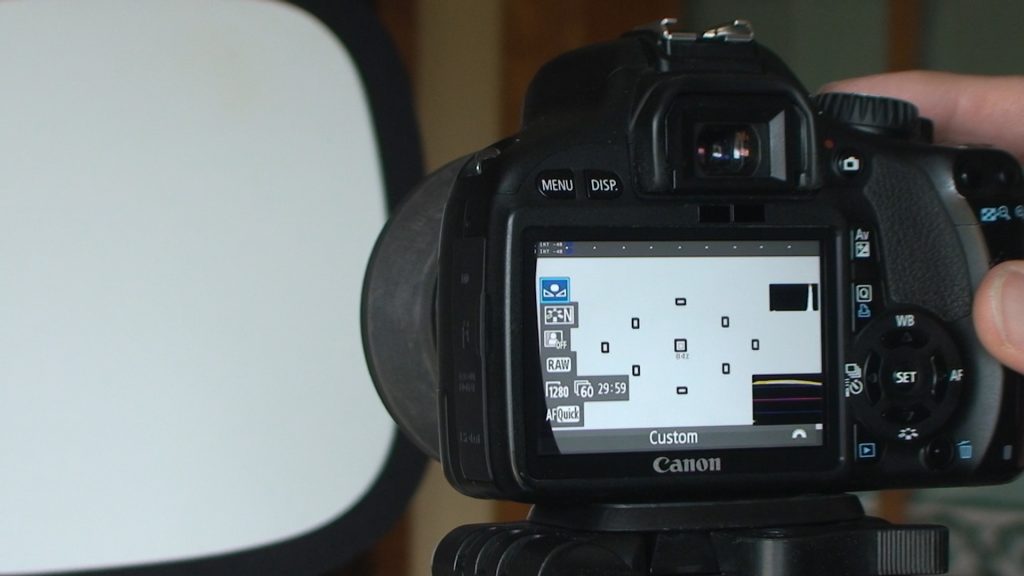
A neutral reference is widely employed for color-critical jobs or scenarios where auto white balance is likely to fail. If you are lucky enough, neutral references can be a part of your setting. They can also be mobile objects that you take with you. Below is an example of a lucky neutral reference in an otherwise blue twilight environment.
Likewise, pre-made mobile references are often more accurate since it is easy to be persuaded into believing the neutrality of an item even though it is not. Portable connections can be costly and built expressly for photography. They might also be made from less expensive household things. An excellent gray link is one that consistently mirrors all spectrum colors evenly over a wide range of color temperatures.
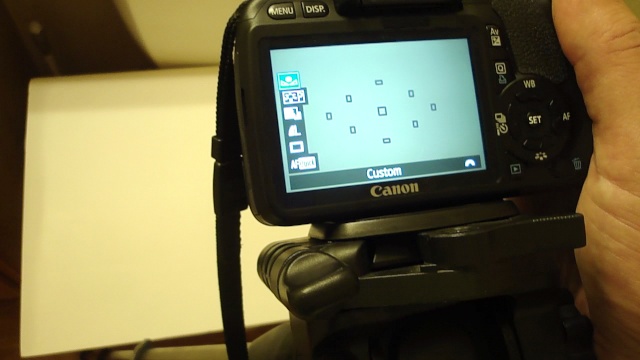
The bottom of a pringles or coffee container lid is a popular home-neutral reference. Although custom-made picture references are ideal, these are both economical and precise. Custom-made equipment is applicable when determining the illuminant’s incident or mirrored color temperature. An ‘ExpoDisc’ or white balance meter may accurately measure incoming light, although many neutral references evaluate reflected light.
When utilizing a neutral reference with a great deal of picture noise, be careful since clicking on a gray region might choose a colorful pixel owing to color noise. The ideal method to white balance noisy photos is to utilize the aggregate of pixels with a noisy gray zone as your reference. But, this is only possible if your software allows it. Using Adobe Photoshop, this can be a 5×5 or 3×3 pixel average.
How to Adjust White Balance in Post-Processing Software
Post-processing allows you to modify the color temperature to suit your artistic style with a single click. For the sake of this tutorial, I will demonstrate how to alter the white balance in post-production using three of Adobe’s most popular editing applications.
Adobe Camera RAW
The technique with Adobe Camera RAW is nearly identical to that used in Lightroom. The only difference is that you will not require access to the “Develop” tab. Rather, the sliders are visible immediately. Change the’ Temperature’ slider to determine the perfect white balance for your photograph. You may also fiddle with the’ Tint’ slider if you have any undesirable magenta or green color casts.
Adobe Lightroom
Adjusting the color temperature in Adobe Lightroom cannot be simpler. The first slider you will notice in the develop panel after opening a photo in the “Develop” section is the one labeled “Temp.” This is the one with which you should collaborate. You can change the image’s temperature by moving the slider, as the name says. You may lower the tones by forcing them to the left. If you move it to the right, the colors will be warmer.
Adobe Photoshop
With Adobe Photoshop, things are usually a little more tricky. On the plus side, the effect can be more accurate. Under Color Balance in New Adjustment Layer under the Layer category, you will locate the “Color Balance” adjustment layer.
You may utilize masking to adjust the white balance across different image sections. These may include mid-tones, shadows, and highlights. You will not have just one slider, either. You can experiment with additional color casts in each region to get the optimum white balance setting for each portion of the image.
How to Use White Balance in a Creative Manner
Given that there are different types of digital cameras, there is no precise procedure for using the white balance in a camera. But, you can alter the presets on your digital camera using the techniques presented in this guide. Adjusting your camera’s white balance is very dependent on your camera’s model and brand.
White balance settings are often accessible through a dedicated button on professional-level cameras. You can also manually set a Kelvin value. This is accomplished by the use of dials and buttons on the body. You may discover that you select presets from the settings menu on lower-level cameras. This may be found under the shooting options. On certain non-essential shoots, I recommend experimenting with different white balance presets.
How to Use White Balance in your Digital Camera
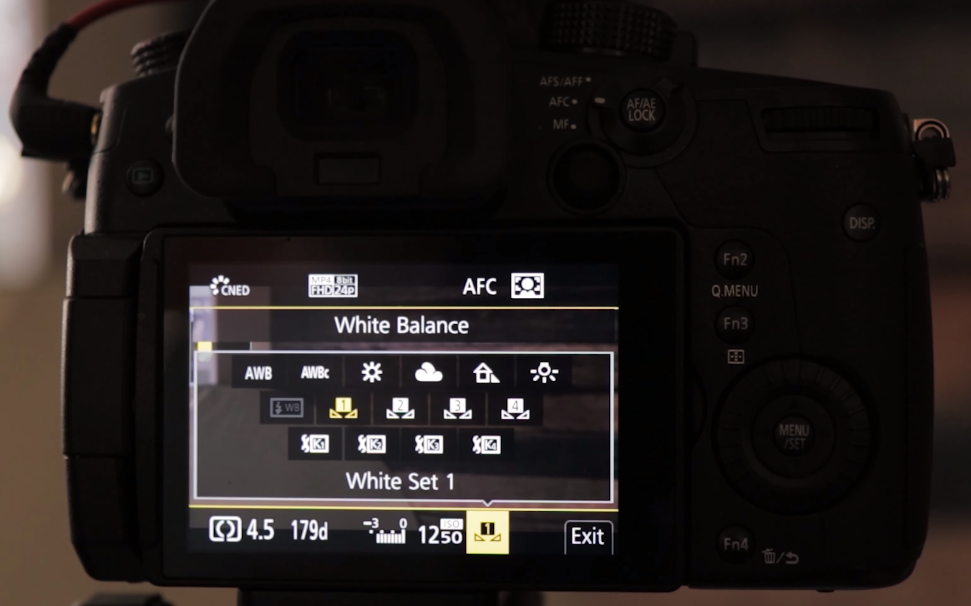
Given that there are different types of digital cameras, there is no precise procedure for using the white balance in a camera. But, you can alter the presets on your digital camera using the techniques presented in this guide. Adjusting your camera’s white balance is very dependent on your camera’s model and brand.
White balance settings are often accessible through a dedicated button on professional-level cameras. You can also manually set a Kelvin value. This is accomplished by the use of dials and buttons on the body. You may discover that you select presets from the settings menu on lower-level cameras. This may be found under the shooting options. On certain non-essential shoots, I recommend experimenting with different white balance presets.
Conclusion
White balance is a vital tool for boosting the quality of your photographs.

Whatever genre or type of photography you like, controlling the color temperature of your pictures is essential for communicating ambiance and other visual aspects. You will take a significant step toward taking more effective photos if you master the white balance in every setting. It may take a little practice to comprehend how it works completely, but you can get exceptional results in no time!
FAQs
• Is white balance important?
Because it may be tough to alter afterward (particularly if the image was shot in a lossy format like JPEG), getting natural-looking colors and skin tones in photos is critical.
• What does white balance mean?
While balancing is adjusting colors in photographs to make them look more natural, it is also used in photography. These modifications can be made both in-camera and afterward in post-production.
• Can you change the white balance?
Changing the white balance on most cameras is simple. While higher-end cameras often have a dedicated button for altering the white balance, lower-end cameras may have a menu setting.
• Should you use auto white balance?
Using the Auto White Balance setting while shooting in RAW format is safe because it may be altered afterward in post-processing software. Auto White Balance should operate effectively in normal lighting circumstances when using a recent digital camera and shooting in JPEG format. On the other hand, Auto White Balance may yield varied results while shooting in mixed light or difficult lighting situations.
• Does white balance have an impact on an image?
White balance may have a big impact on an image’s overall hues. It may make the image appear too cool (bluer) or warn if it is set wrong (more orange).
• Is it possible to white balance a shot?
To take a test image, hold the grey card close to your subject and utilize the Custom White Balance option (this process may differ depending on your camera). Professional photographers do this to ensure that their camera’s white balance is correct for the scene they are photographing.
• Should you set white balance when shooting RAW?
The RAW picture is unaffected by adjusting the WB. However, you don’t need a gray card to shoot RAW and obtain a WB; the camera can supply an auto WB, or you can choose one beforehand, either through a gray card or a camera preset.
• Is it better to shoot JPEG or RAW?
Compared to a JPEG image, a RAW image has a broader dynamic range and color spectrum. This is particularly helpful when a picture or sections of an image are underexposed or overexposed. A RAW image has excellent highlight and shadow recovery capability than a JPEG image. It also provides better possibilities for finer control and modification.
• What is the ideal white balance?
It is dependent on the illumination. If you are unsure what white balance to use, go with “Auto” (Auto White Balance).
• How do you achieve the perfect white balance?
Using an 18 percent gray card with a camera that can monitor reflected light and properly set white balance is the best approach to obtain perfect white balance every time.
• Is exposure the same as white balance?
No. White balance is concerned with colors and how warm, cool, or natural your image seems. On the other hand, exposure is concerned with how much light hits your sensor and how bright or dark your shot ends up being. You may have a perfectly exposed image with a bad white balance.

About Author
Connor Kovack is a Los Angeles based professional photographer & videographer with over 6+ years of experience. Connor is CEO of KovMedia and specializes in Music Videos, Commercials, Photography & More.
