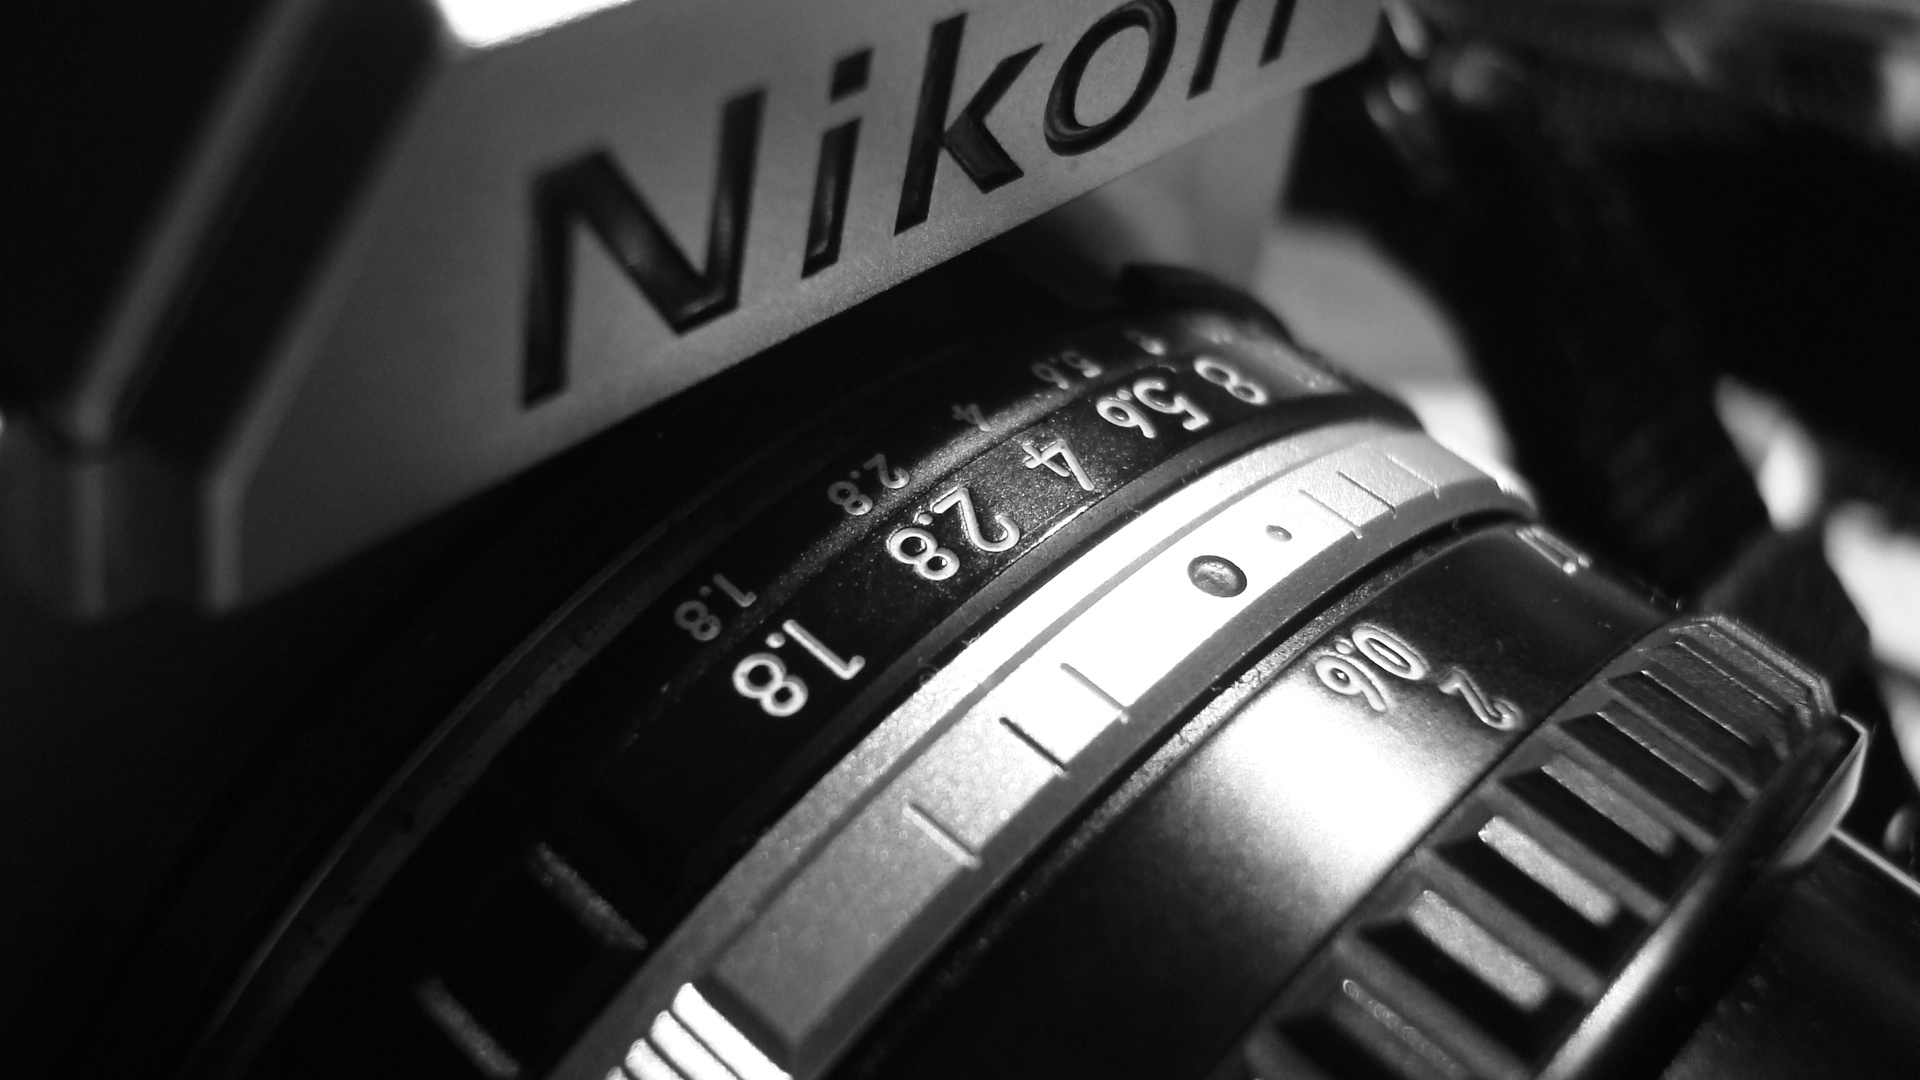
While terminology making up the exposure triangle (shutter speed, aperture, and ISO) might sound a little familiar to a beginner photographer, encountering a trickier term like f-stop might blow your mind away. So, what does f-stop have to do with photography?
As you venture into photography, whether it is a portrait, landscape, wedding, macro, fine art, or product photography, you must understand that light is the backbone of a successful photo. Unless there is light, you can hardly see the subject of your photo.
For that reason, in your photo-taking adventures, choosing the right amount of light is one of the most important decisions you will have to make. The amount of light in your photos will be controlled by your camera’s aperture. The aperture is in turn controlled by what we call f-stops. As you become familiar with using it, you will begin to appreciate the role it plays in taking a great photo.
Luckily for you, that doesn’t have to be an uphill climb or rocket science. Before you get to the practical part, minimize the confusion by grasping the foundational theoretical knowledge of f-stops. In this guide, we’ll take you back to the basics and expose you to some fundamental insights about f-stop and how it can help shape your journey to taking the perfect photo.
Contents
- Is learning f-stop that important?
- Why is aperture important in understanding f-stop?
- What is f-stop?
- What does the f-number in aperture mean?
- What is the meaning of ‘f’ in f-stop?
- How do you choose your camera lens wisely?
- How do you know which aperture setting to use?
- Learn how to adjust your camera’s f-stop
- Why does f-stop matter?
- How do you use f-stop in your photos?
- Frequently asked f-stop questions
- · What is the best f-stop to get a beautiful background blur?
- · Is f-stop the same as aperture?
- · What is the effect of increasing the f-stop?
- · How do I balance between a large f-stop and a small f-stop?
- What scenarios are ideal for a smaller f-stop?
- · Why does light control matter?
- · How do I read the aperture size?
- · What does changing my f-stop do?
- · What does exposure mean?
- · What is the best lens for a bokeh blur?
- · How do you achieve a bokeh blur?
- · What lenses work best with f-stop?
- Final thoughts
Is learning f-stop that important?
- While riding on the automatic mode of your camera seems less daunting, certain situations and scenes like sunsets and sunrises demand full manual control because it is not uncommon for cameras to misread the environment. For the perfect photo in these scenarios, mastery of f-stops is imperative.
Why is aperture important in understanding f-stop?
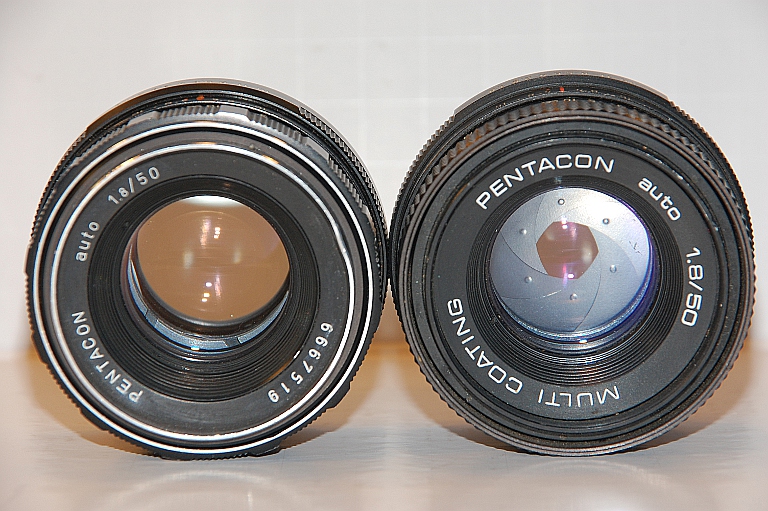
As highlighted above, the aperture is one of the critical pillars of the exposure triangle in photography. In other words, you cannot fully comprehend f-stops without having a good grip on the true definition of aperture.
It refers to the opening or hole in a lens that lets light through after pressing the shutter release. It borrows heavily from the analogy of the human eye. Your iris expands or shrinks as you alternate between bright and dark spaces effectively affecting the size of your pupil.
The aperture is underscored by the ‘pupil’ of the lens. You can widen or shrink the size of your aperture to let in varying light intensity through to your camera.
The opening and closing of the aperture are made possible by the aperture blades or diaphragm. This terminology is important because it always pops up when talking about large and small apertures or stopping down (closing) and opening up (widening) the aperture blades in any given shot.
Shots captured with a large aperture vary starkly from those captured with a small aperture. Why? Because the aperture size directly affects the brightness of the photo. Typically, a large aperture allows additional light to pass than a smaller aperture. Moreover, aperture also largely influences your depth of field which tells to what extent your image is in focus.
Understanding the dynamics of aperture will give you a clearer perspective when discussing f-stop and especially the f-stop aperture scale. Come along.
What is f-stop?
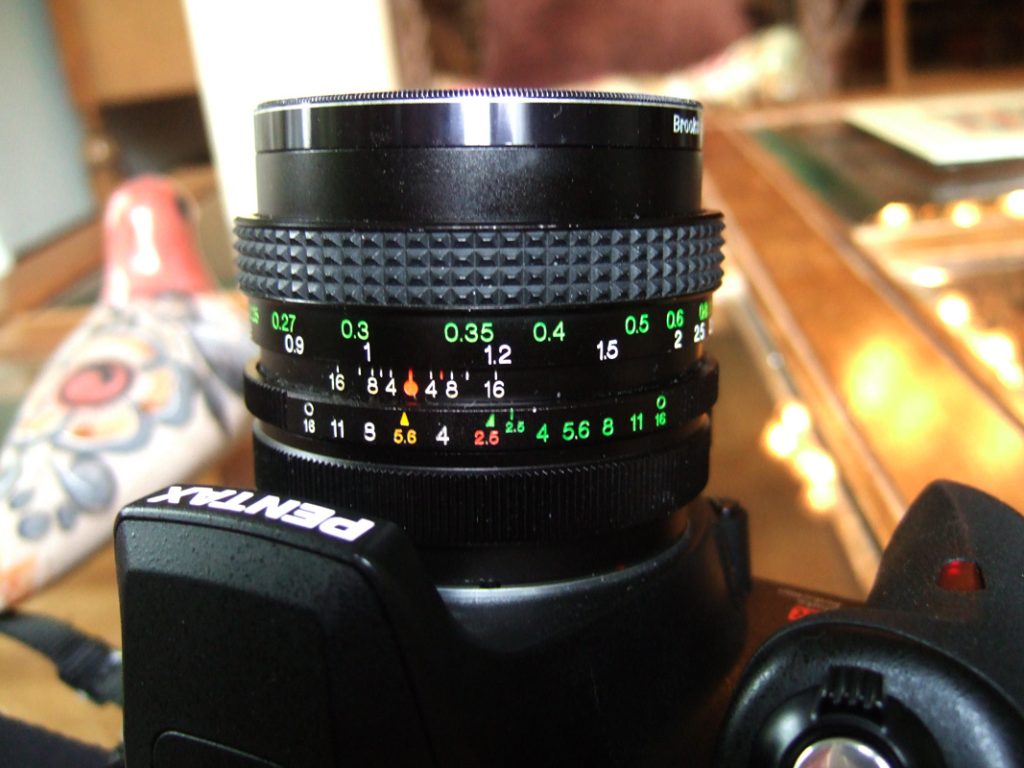
Think of f-stop or f-number as a setting in your camera that dictates the aperture of the lens on any given photo. In simpler terms, f-stop controls the size of the aperture to let in a certain amount of light (how wide your lens can open). It, therefore, measures the amount of light entering your lens and the brightness of your exposure.
The ‘f’ in f-stop represents the focal length of the lens. The f-stop shows the ratio of your lens focal length to the diameter of the aperture. Each time you change the size of the lens aperture on your digital camera, the number that displays on the LCD screen or viewfinder is the f-stop.
The number might look something like f/2.8, f/4, f/5.6, and so on. It may also take other forms like f2.8, f4, or f5.6 (without a slash sign) or even F2.8, F4, or F5.6 (with the addition of a capital letter). So, if you encounter any of these numbers or symbols don’t fret, they all mean the same thing as an f-stop.
That said, these are not the only f-stops you should expect to interact with. The list is long and includes much bigger numbers up to f/64 as well as much smaller ones down to f/1.2.
A related term to f-stop is ‘wide open’. This is when your f-stop has stretched as wide as it can open and cannot do anything beyond that. For instance, if you are using an f/1.2 lens to shoot at f/1.2, you can describe that as shooting wide open.
Another terminology commonly used alongside f-stop is ‘stop down’. Stopping down your aperture essentially means reducing your f-stop or using a bigger denominator number.
What does the f-number in aperture mean?
Coming across an f/4 for a beginner might throw in a lot of confusion. You’ll probably be wondering, ‘what does this code even mean?’ Well, relax. That’s just the labeling of aperture.
Take the aperture of f/4 for example to mean ¼ or one quarter. Similarly, an aperture of f/8 stands for 1/8 or one eighth and so on.
With that in mind, recall your elementary understanding of fractions. The smaller the denominator, the larger the fraction, and vice versa. In other words, ¼ liters of milk is more than 1/8 liters, and so on. You get the logic.
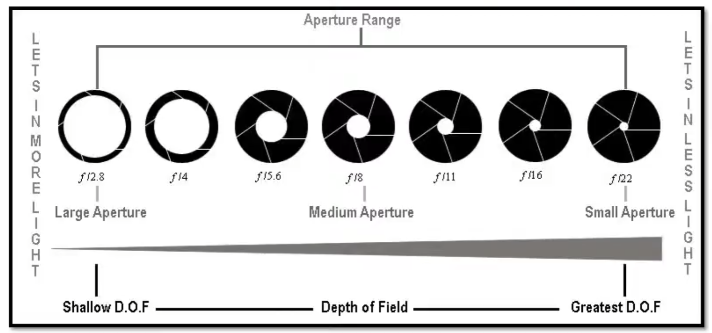
Now, the same logic applies to aperture measurements. An aperture of f/4 is larger than an aperture of f/8. That should be enough to help you put your confusion and guesswork to rest. The rule of thumb is, always to think of aperture as a fraction and all else will automatically fall in place.
If you run into a term like ‘large aperture’, think of it as an aperture with a smaller fraction denominator like f/2, f/2.8/, on f/4 (large aperture). On the flip side, terminology like ‘small aperture’ refers to an aperture with a larger fraction like f/11, f/16, or f/22 (small aperture).
Sounds counterintuitive? Yes, but really simple to master the trick with more practice.
What is the meaning of ‘f’ in f-stop?
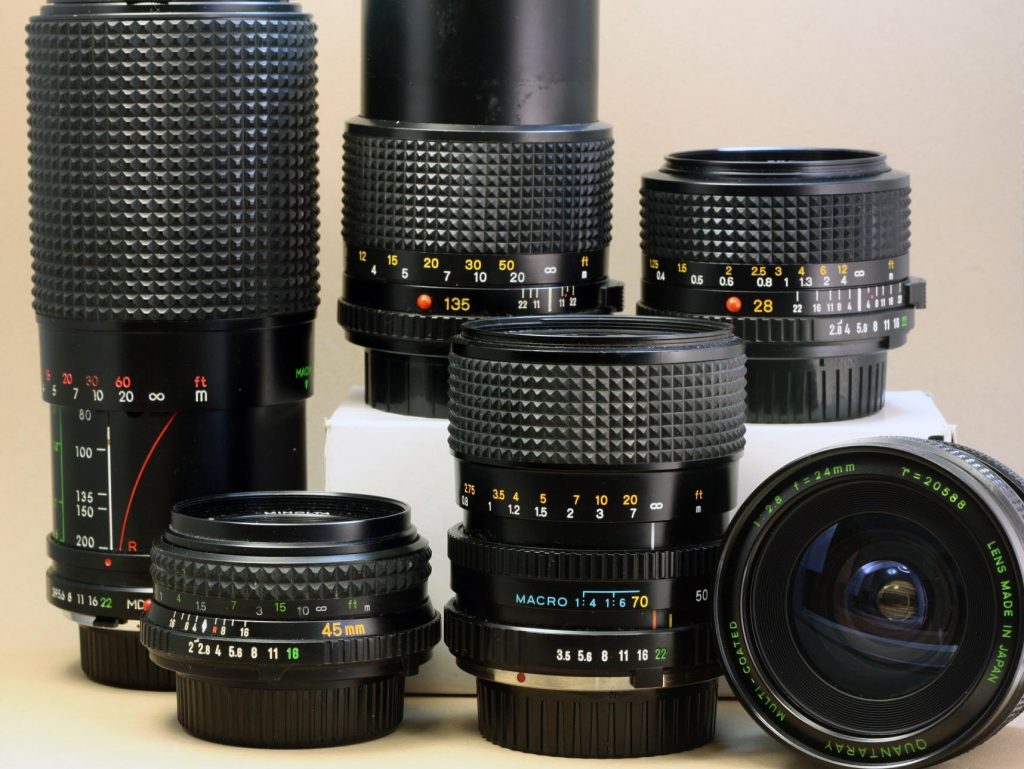
As mentioned earlier, the ‘f’ in f-number stands for focal length. It denotes how much your aperture blades are opened. It measures the optical distance from the point of convergence of light rays to the sensor.
The f-number can be expressed mathematically as the focal length of the lens divided by the entrance pupil diameter.
If the focal number of your lens is 20mm and its entrance pupil diameter is 5mm, for instance, the f-number translates to 4 (20/5). The expression then becomes f/4 which represents your aperture diameter or f-stop.
In another example, if you have a focal length of 80mm-200mm and a maximum f-stop of f/2.8 and zoom out the lens to 80mm with an f/4 setting, your aperture blades will amount to a diameter of 20mm (80/4). Reducing the setting to f/8 further reduces the aperture blades to 10mm (80/8).
With this analysis, you can now clearly see why an aperture of f/4 is a larger aperture than that of f/8.
How do you choose your camera lens wisely?
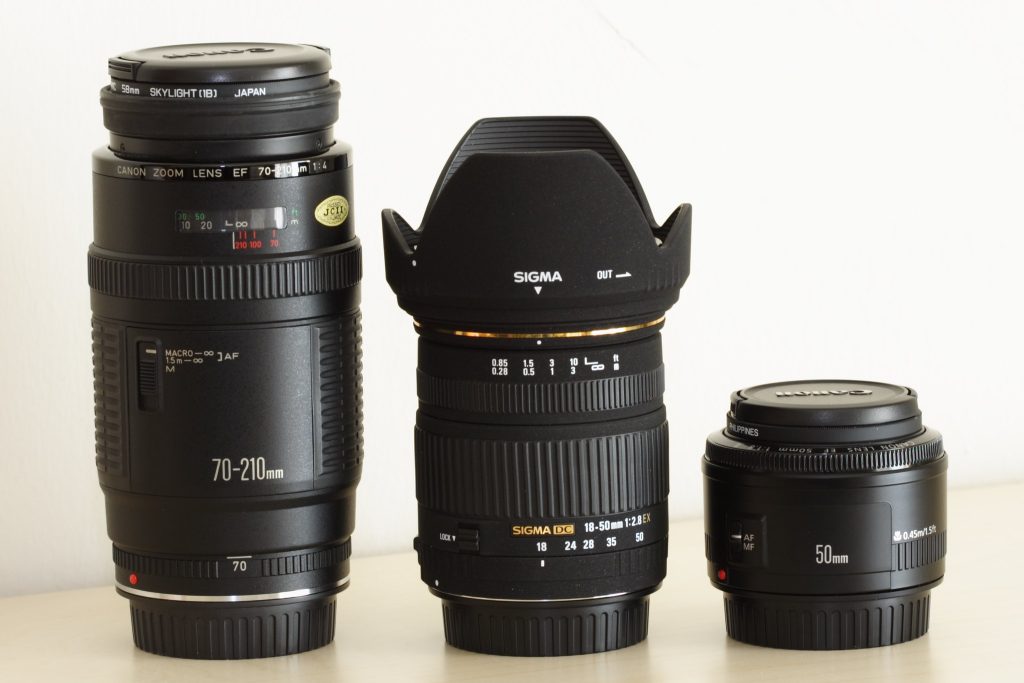
The lens you work with determines the range of f-stops you can function with as a photographer. The maximum aperture for your lens is represented by the lowest f-stop your lens can work with.
For most lenses, the maximum aperture stands at f/2.8 or f/4 with some varying more than others. Ultimately, the type of lens you shoot with will boil down to the type of photos you specialize in.
Landscape photographers mostly prefer to shoot in broad daylight hence a low f-stop may not be that necessary. On the other hand, astrophotographers who shoot with a fast low-light lens may need a wider aperture say from f/2.8 or higher.
That said, you might also want to think about the size of your pockets. The faster the lens, the larger the aperture, and therefore, the heftier the price. For a more budget-friendly option, go for slower lens that have much smaller apertures.
At the end of the day, you should be asking yourself, ‘what are my needs?’ and ‘is a maximum aperture really necessary for the shot I plan on taking?’
How do you know which aperture setting to use?
To answer this question correctly, you must know the most common apertures used in different scenarios. You cannot just set any f-stop value you please. At some point, you will have to be considerate of the aperture blades. They have their limits too you know.
As we dive into common aperture ranges, remember that a smaller f-number represents a large aperture whereas a larger f-number represents a small aperture.
Where is f/11 to f/32 commonly used?
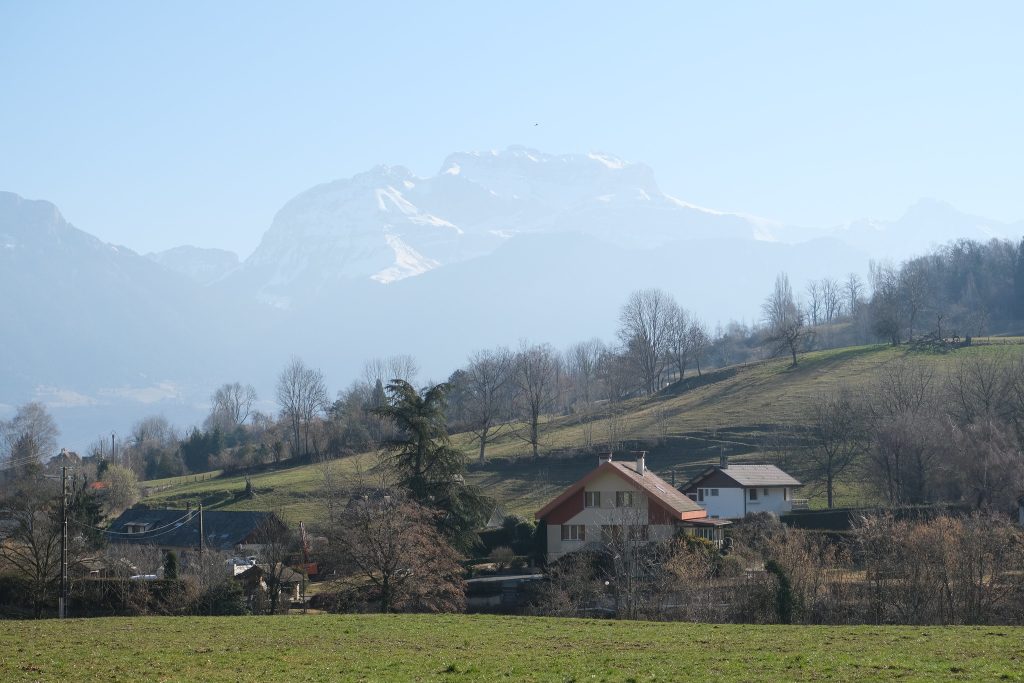
As you might have guessed, these f-numbers represent small apertures. Usually, small apertures are most suitable for landscapes and other bright scenes. An f-stop of 11 or higher gives you a wide depth of field. This places most of the detail within your frame in focus.
In case you are taking shots of different subjects at varying distances from your position, increase your aperture to ensure every detail is captured. Higher f-stops also come in handy to product photographers because product photography demands that all the details be in focus.
Where is f/4 to f/8 most appropriate?
These mid-range apertures blend in well with most scenarios. Not only do they allow a decent amount of light to pass through the lens but also provide an excellent depth of field to ensure as many objects as possible come into focus at varying distances. While at it, they also create a conducive environment for a good blurry background.
What’s more, within this aperture range with a wider depth of field, you can expect to get more contrast for your shots.
What is f/1.2 to f/2.8 most ideal for?
This range of f-numbers translates to large apertures which let in much more light into the camera hence most ideal for poorly lit scenarios. These f-stops are also widely applicable when taking portrait shots because of their shallow depth of field. This causes subjects in the photo to be featured more prominently as the background nicely transitions into a bokeh blur.
This out-of-focus blur is what adds an extra layer of aesthetics to your photographs. Thanks to these wider apertures, you can place your singular subject in focus and throw everything else that is not in the foreground out of focus.
If you are after maximum aperture for your shots, you should know what to look for when shopping for your next digital camera. Most manufacturers these days bundle the f-number with the lens name. The f-number indicated represents the largest aperture for that particular camera lens.
For instance, a lens marked 50mm/1.2 means its largest aperture is 1.2, and one marked 80mm-200mm f/2 shows a maximum aperture of f/2.
That said, there are other lenses that come with variable maximum apertures based on the focal length adjustments. For example, a lens marked 35mm-85mm f/3.5-5.6 will have a maximum aperture of f/3.5 at 35mm and f/5.6 at 85mm.
What is the f-stop aperture scale?
To sum up the f-number ranges and their applications, let’s outline the f-stop scale for a more vivid picture. Note that as you move down the scale, the aperture allows only as much as half the light of its predecessor into the camera.
In a nutshell, this is what your f-stop scale looks like:
- f/1.4-picture-wise, this is seen as a very wide aperture paving way for additional light to come in and have a shallower depth of field
- f/2.0-this aperture lets in only half of the light let in by f/1.4
- f/2.8-similarly, with this aperture, only half the light let in in f/2.0 comes through, and so on
- f/4.0
- f/5.6
- f/8.0
- f/11.0
- f/16.0
- f/22.0
- f/32.0-this represents the smallest aperture and lets in the tiniest amount of light (or no light at all) and has a very large depth of field
While these are the most popular f-stops, there are some lens options that allow you to set some in-between values not captured in the scale. For example, the f/3.5 mentioned in an earlier illustration is a popular setting.
The wide-ranging aperture settings are to suit your different scenarios combined with other settings such as sharpness and depth of field.
With that in mind, you should always select your aperture while taking into consideration the other two exposure triangle pillars (ISO and shutter speed). The aperture scale should only act as a quick reference tool but not the entire determinant for your shot.
Each shot is different from the next one and several factors might come into play. You cannot claim that there is a specific f-stop for you to shoot within any given scenario. It all comes down to the right balance of your shutter speed, ISO, and aperture. You should always be asking yourself, ‘how do I want the photo to look like?’
For example, when shooting a low-light scene, you might want to combine stopping down the aperture and avoiding a shallow depth of field. To avoid missing any details, you could maintain a mid-range aperture and add a flash to the shot. You can as well intensify the ISO to make up for the low lighting. Another option would be allowing in additional light by reducing your shutter speed.
All these different settings present you with many different possibilities when taking your photos. At the center of it all, is light. Learning how to play around with light is what determines how fast you become a pro.
Learn how to adjust your camera’s f-stop
Whether you are using a film or a digital camera, you always have a way to adjust the f-stop. You can achieve this using the aperture ring on the lens:
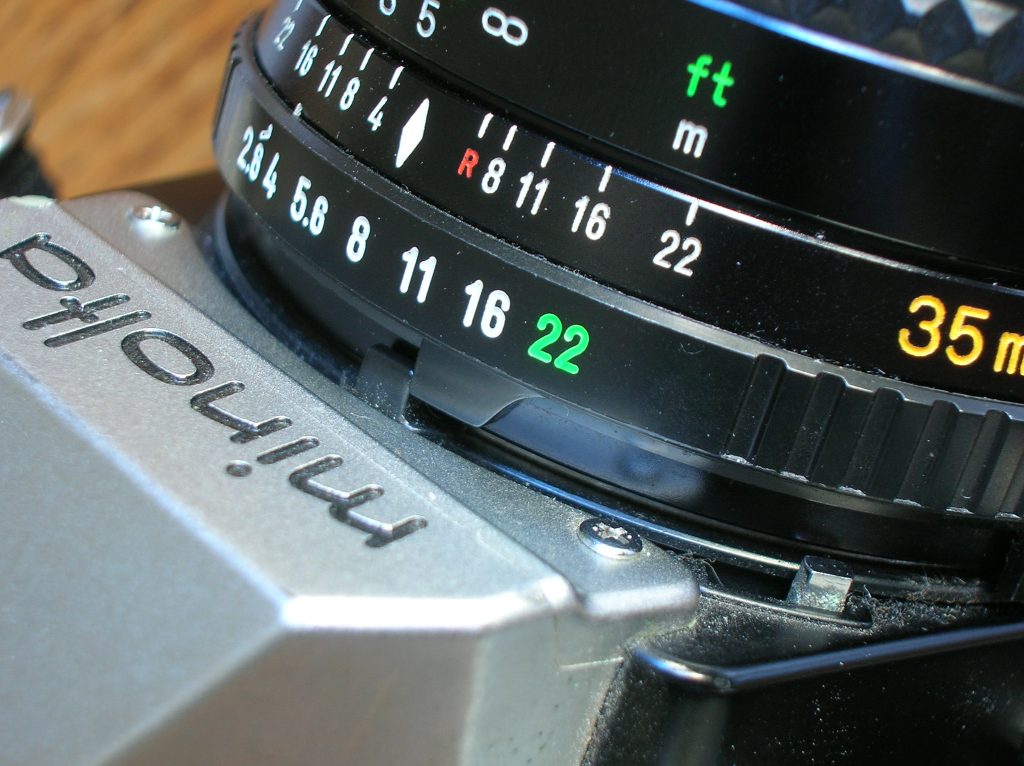
or using a touch screen or a dial-in DSLRs:
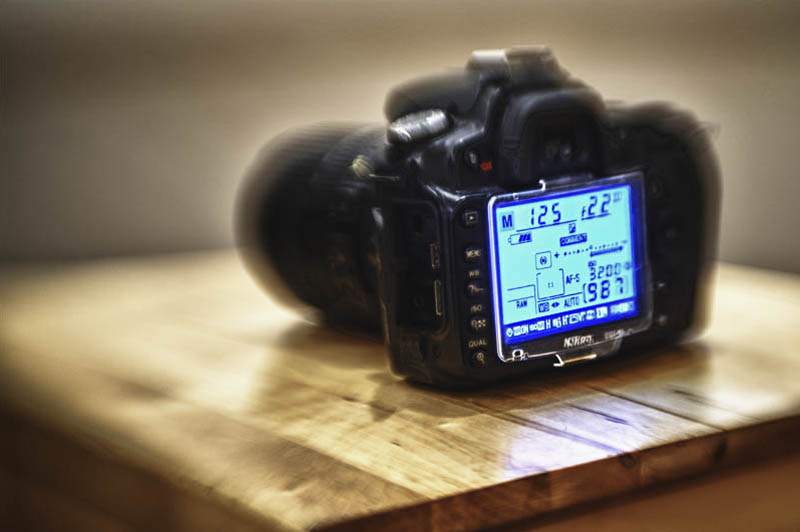
If you are still learning your way through the use of f-stop, you can start by understanding how the exposure triangle functions in your camera. Set your camera to Aperture priority shooting mode (Av). In this setting, you can set your own f-stop, and then the camera automatically modifies the ISO and shutter speed to optimize the exposure.
Once you have fully mastered this, you can take the plunge into manual shooting mode (M). With this mode, you get among other settings, full control over your aperture size. The more you manage the settings and capture the photos yourself, the faster you become a master of your own craft.
Why does f-stop matter?
The reason you must keep adjusting your aperture settings as a photographer is to enhance your depth of field and exposure or brightness of your photos. Once you have mastered these two primary functions as a beginner photographer, the quality of your photos will noticeably improve. Basically, you can use f-stop to sweeten your overall photo-taking experience.
Depth of field focuses on the portion of your photograph that looks sharp from the foreground to the back. You can have a photograph with a shallow or thin depth of field or a deep or large depth of field. In the former, the back of the image is entirely out of focus while in the latter case both the back and forefront appear sharp.
The choice of aperture is what determines the depth of field of your shot. To end up with a shallow focus effect, go with a larger aperture setting. This helps you narrow down your focus by discarding the busy background. On the other hand, going with a smaller aperture makes it difficult to separate what’s in the foreground from what’s in the background.
Generally, large apertures like f/1.4, f/2, and f/2.8 are ideal for portraits and other photos where your main focus is isolating a particular subject or certain sections such as the eyes. Small apertures like f/8, f/11, and f/16 mean little background blur. They are therefore ideal for architectural and landscape photography to give a seamless sharpness from the front to back of the image including the distant horizon.
How do you use f-stop in your photos?
The quickest way to learn f-stops and integrate them into your photography is by learning from the best & through regular practice. Start by using f-stops as often as possible in your day-to-day photography adventures. You can start by shooting the same scene using a range of aperture settings and take note of how the images vary from one setting to the next one.
Once you are through with this attempt, proceed to experiment with different lenses at your disposal. Focus on the range of aperture settings that each lens has and observe the difference in the shots taken. Note down how each lens affects your photos.
In case you are experimenting with a zoom lens, set it to the widest aperture and try adjusting the f stop number with each shot. This should tell you how your maximum aperture transitions with the zooming.
Lastly, start with baby steps or milk before weaning yourself into solid food. As previously mentioned, the Aperture priority mode is the safest launchpad for your professional photography journey. Starting out with this setting gives your camera ample time to adapt its shutter speed while maintaining a consistent exposure between frames.
As you learn to adjust your aperture settings and shutter speed, you can comfortably switch to manual mode and be more in control of your photography experience.
Frequently asked f-stop questions
· What is the best f-stop to get a beautiful background blur?
To get that pleasant bokeh background, most photographers use an f/1.8 aperture. However, this is not the only way to get good bokeh. The best and most recommended approach is to try different f-stops in your photography until you produce the best image.
· Is f-stop the same as aperture?
Sort of. There is a difference between the two and most photographers use the terms interchangeably.
Aperture represents the actual hole or opening of the lens diaphragm that dictates how much light gets into the camera. On the other hand, the f-stop is just a measure or ratio of the focal length of your lens to its aperture diameter.
· What is the effect of increasing the f-stop?
Increasing the f-stop is basically just using a smaller denominator in the fraction. This will produce a large aperture and hence a shallow depth of focus. A higher f-stop is also a way of letting in additional light.
· How do I balance between a large f-stop and a small f-stop?
A large f-top results in a wider aperture hence letting in more light. The opposite is also true with a small f-stop. To neutralize the effect of this, you may have to slow down your shutter speed or ramp up your ISO to let in more light into the camera.
What scenarios are ideal for a smaller f-stop?
Smaller f-stops are mostly ideal for:
- Shooting fast-moving subjects
- Landscape photography
- Photographing a group
- Weaving the foreground into the background
- Creating a starburst effect
- Photographing the sky at night
· Why does light control matter?
Controlling the passage of light through your lens helps in controlling the overall exposure of your image. This is important in avoiding overexposure (image too bright) and underexposure (image too dark).
· How do I read the aperture size?
While this may sound somewhat counterintuitive or paradoxical, with practice everything lines up perfectly. The key trick is understanding that the smaller the f-number (such as f/1.4), the larger or wider the aperture. Conversely, the bigger the f-number (such as f/22), the smaller the aperture.
· What does changing my f-stop do?
It is simple. If you adjust to a wider aperture say anywhere from f/1.4 to f/2.8, you are essentially letting in more light through the lens. The effect of this is you get to shoot with a faster shutter speed.
On the flip side, a narrower aperture say anywhere in the range of f/16 to f/22 lets in less light into the camera allowing you to shoot at a much slower shutter speed.
· What does exposure mean?
Exposure is fundamentally the backbone of photography. Each time the aperture opens up to let in light when taking shots, the camera’s sensor produces a response. The sensor is responsible for creating visual data within the camera. The amount of light that ultimately reaches the sensor is termed exposure.
· What is the best lens for a bokeh blur?
For the most pleasant bokeh in your photo, you must use a fast lens. The faster your lens is the better the bokeh produced. The least f-stop you can use for such an outcome is f/2.8. However, faster apertures like f/2, f/1.8, and f/1.4 are the most ideal.
· How do you achieve a bokeh blur?
Getting a visible bokeh blur in your image is best realized by increasing the space between your subject and its background. How? Simply shorten the distance between whatever you’re photographing and the camera. The further away from your subject the background is, the more out of focus it will be hence the better the bokeh blur.
· What lenses work best with f-stop?
There are currently two types available in the market: ‘prime’ and ‘zoom’. Prime lenses have been designed to operate with a fixed focal length. On the other hand, zoom lenses are more flexible and can work well with a variable focal length.
Focal length is simply the millimeters (mm) indicated on your camera lens. Prime lenses come marked with only one mm number and zoom lenses several. Prime lenses are considered the best because they provide maximum aperture and more pleasant photographs.
Final thoughts
F-stop and aperture might sound more confusing on paper but it’s pretty easy once you get used to using it. After learning how the f-stop metric works in this guide and how it affects your photos, what’s left of you is to play around and experiment with your aperture.
In the beginning, you may struggle to get the right balance for all your settings at once but with more practice, you’ll get the hang of it. And guess what? Before long you will be an expert at knowing what settings go with what shooting conditions.
Don’t be shy starting out with the automatic mode of your camera. However, don’t get too comfortable because you still need to learn by yourself how the f-stop, shutter speed, and ISO collaborate in order to produce the perfect image. This knowledge will open you up to the full functionality of your camera and whole new possibilities of how much you could accomplish with it.
About Author
Rachel Noël is a professional photographer and videographer from the UK with over 10+ years of experience. Rachel specializes in Underwater, Tavel & Portrait photography among other areas.
